
Cuben Connection

I will add all my Cuben Fiber projects here as I make them. Some of them may be posted by themselves but will also be added here. I want all my Cuben projects in one place.
I am making most of the gear necessary for an Appalachian Trail Thru-Hike. Many items on my AT gear list will be made from a very light fabric made by Cuben Fiber Corp. The weight ranges for this material is from 0.29 ounces a sq yard to about 0.5 ounces per sq yard. A square yard is (36" by 36").
=============================
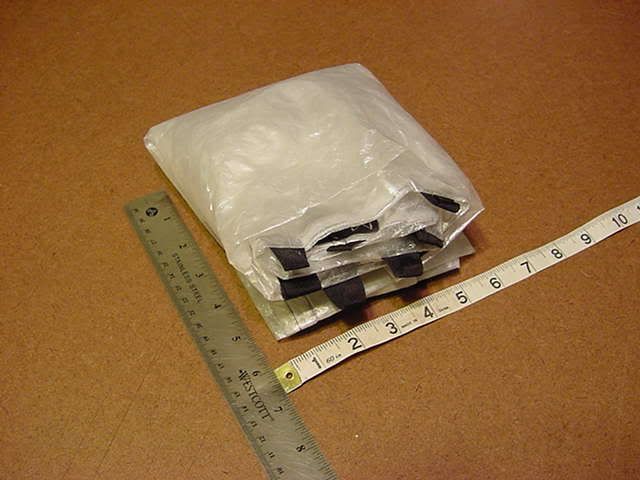
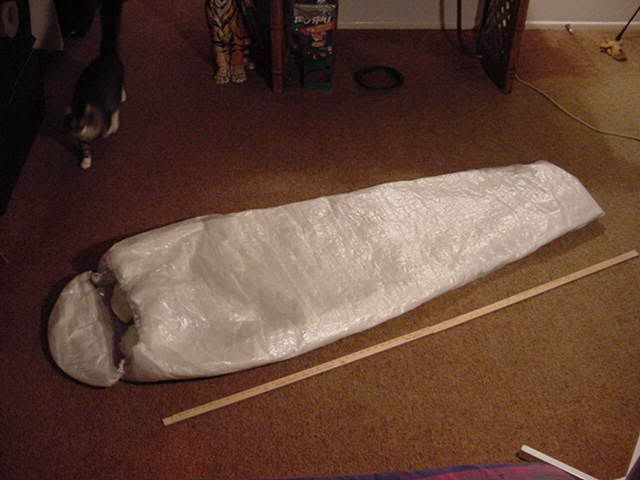
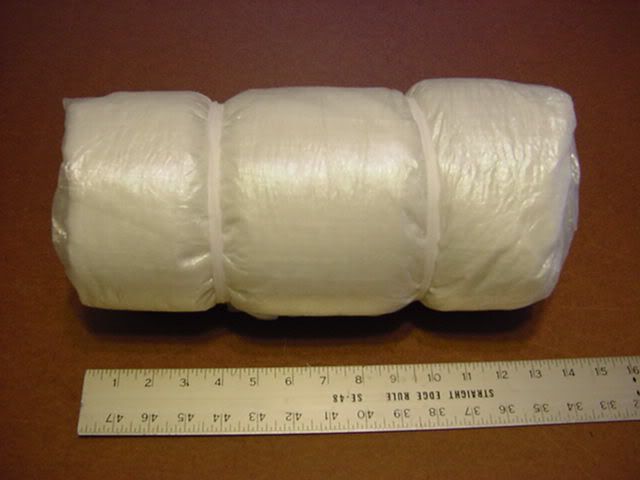
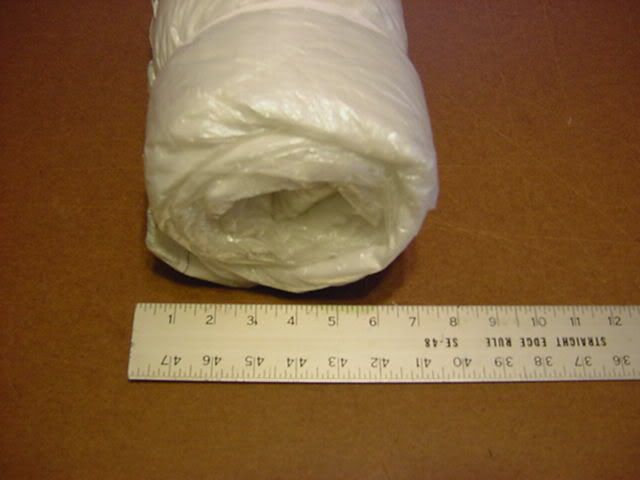
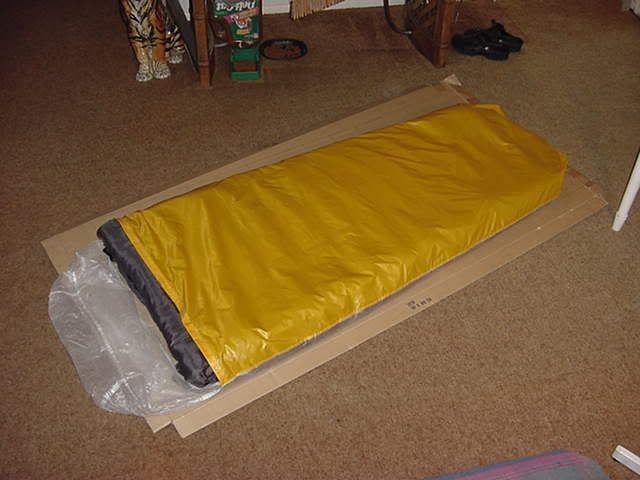
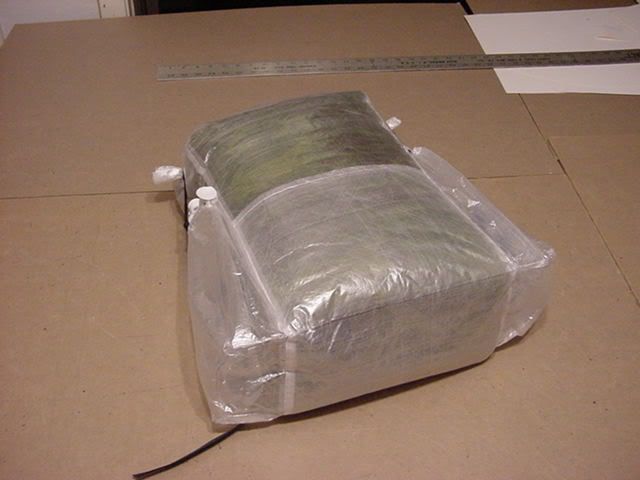
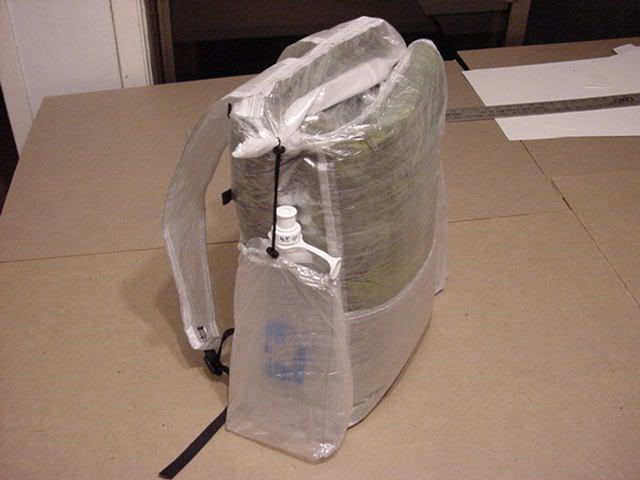
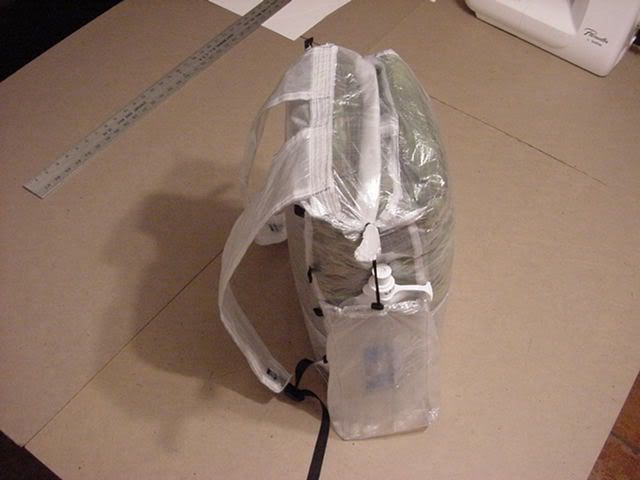
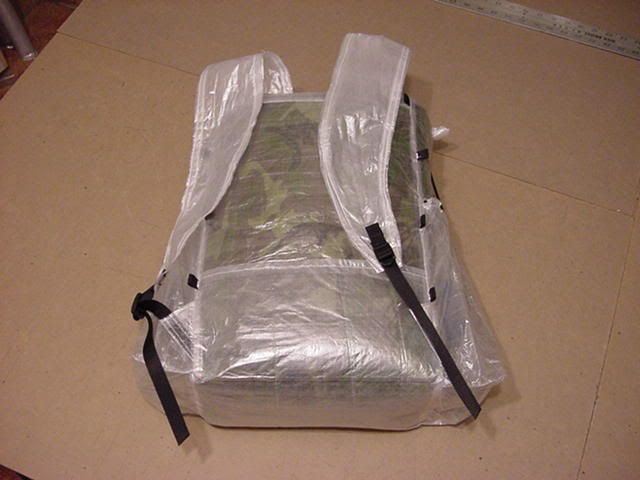
Cuben Material Project Number 1: (This Pack was finished June 14, 2005)
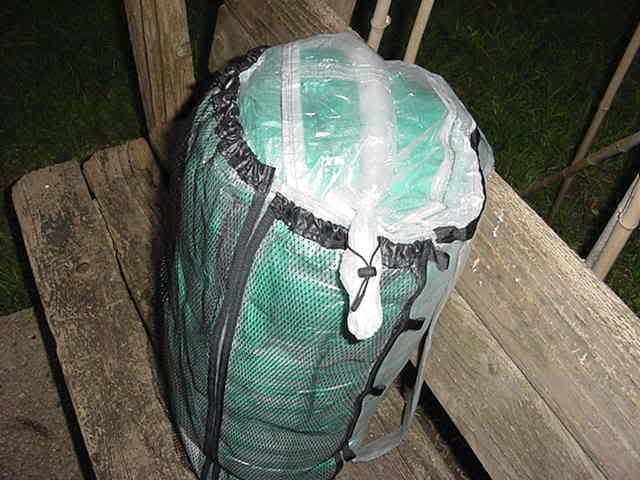
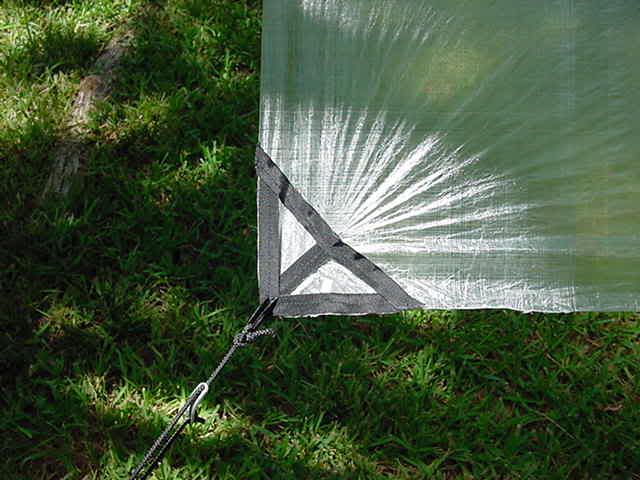
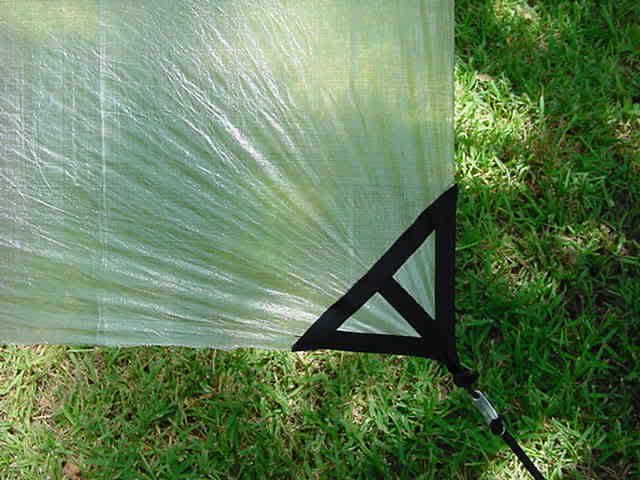
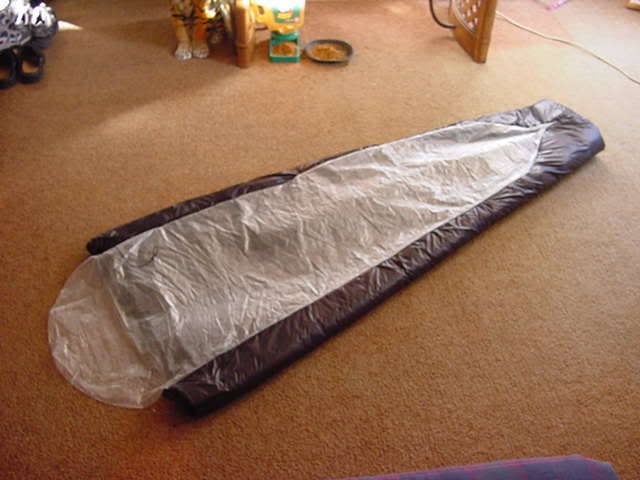
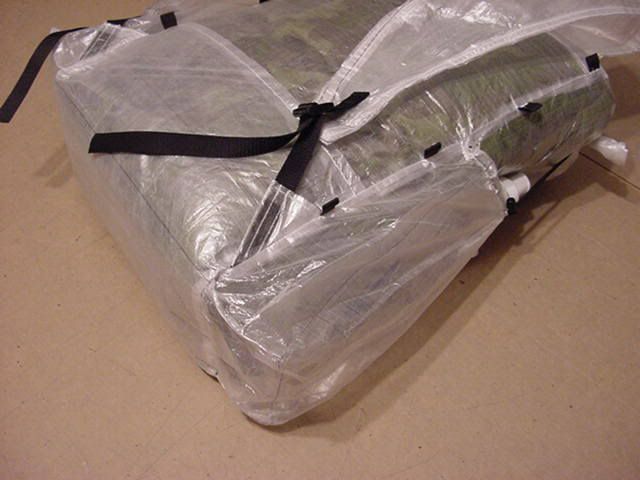
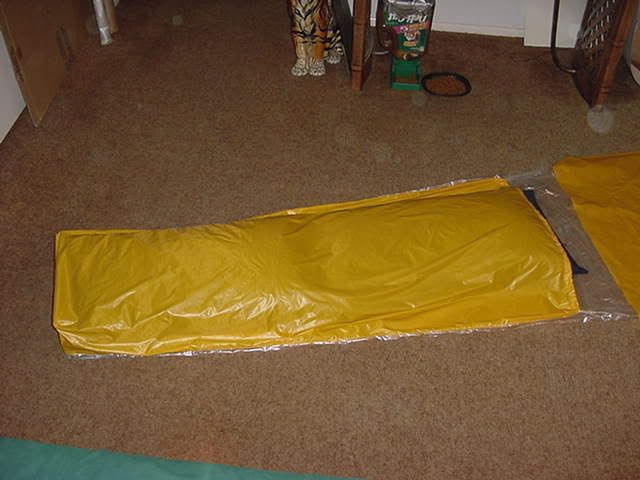
Super Ultra Light Backpack - 2.10oz
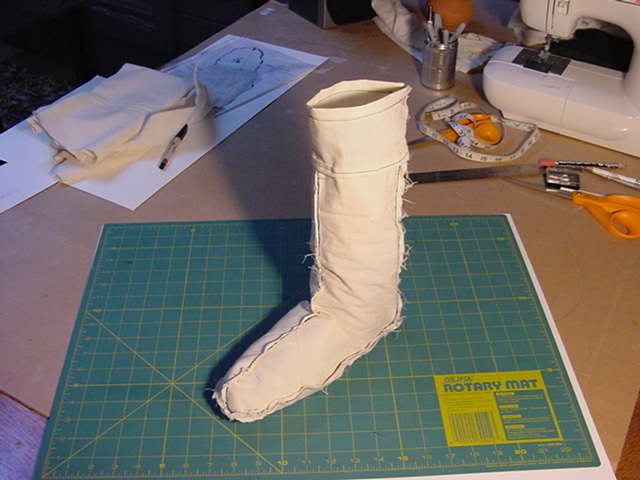
Part 1:
I have a G6 pack that weighs 3.44oz. I like it a lot, however for an AT Thru-Hike I made a few changes. I changed the size a small bit making it 6.5" wide vs the 5" wide G6. I added mesh pockets to each side of the pack and a full mesh pocket for the front of the pack. This gives me 1833 cu inches in the pack and a total of about 730 cu inches for the mesh pockets. I wanted mesh pockets for a lot of reasons. I like to keep my water bottles in a side pocket and my Trap or other wet things in a back mesh pocket. The G6 has a back pocket but it isn't mesh and it has no side pockets. I am sure a lot of the reasons concern added weight. The mesh pockets add 1.28oz to the total weight of the pack
The pack is not quite finished. Tonight I have to decide how I want the top of the pack to close. I like a roll top but don't have a place to put the velcro since that space is now a mesh pocket. I will work something out. I also had to order some small width webbing for the shoulder straps.
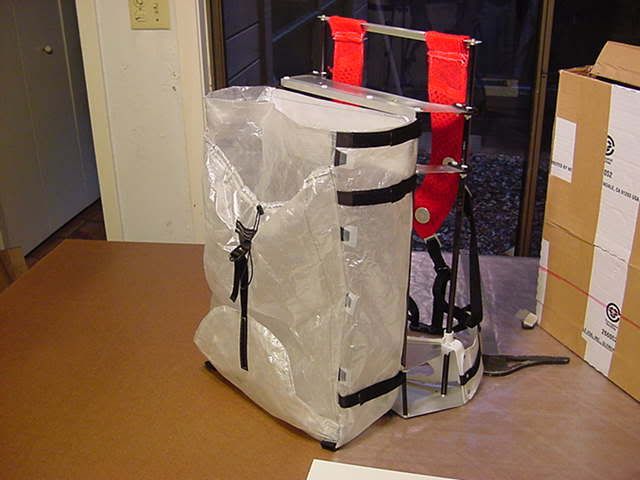
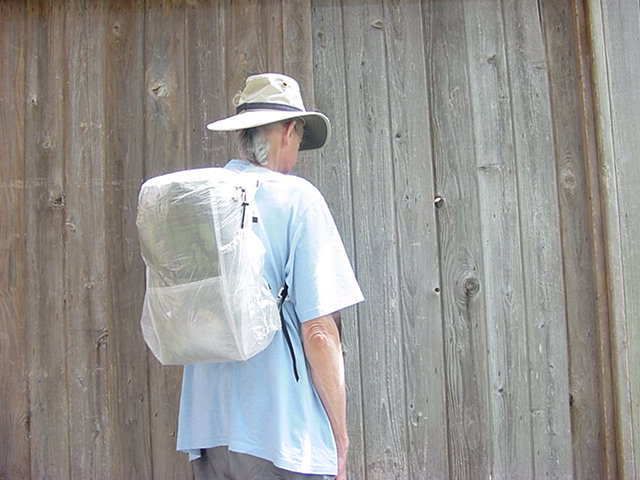
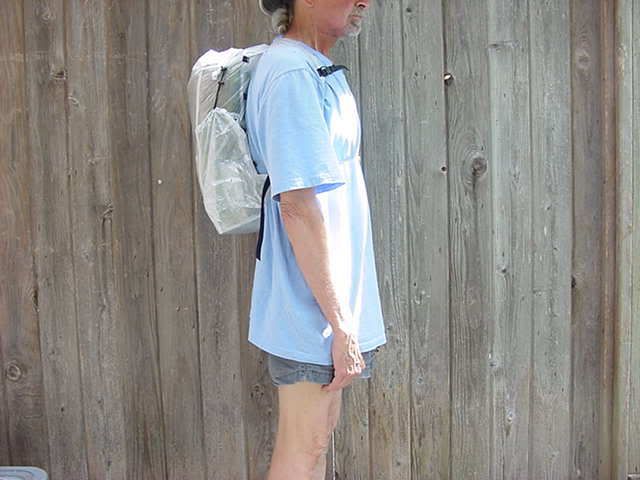
This pack bag will be used on my SUL External Frame.
The weight of the pack bag as you see it in these pictures is 1.96oz. If you consider the 1.28oz weight of the mesh pockets and I left them off the pack bag and made the pack bag the same size as the G6 I think I could make a 1oz G6. I don't have enough of this light weight material left over or I would try. If I get somemore of this kind of sail material I will see just how light I can make a standard G6 size pack.


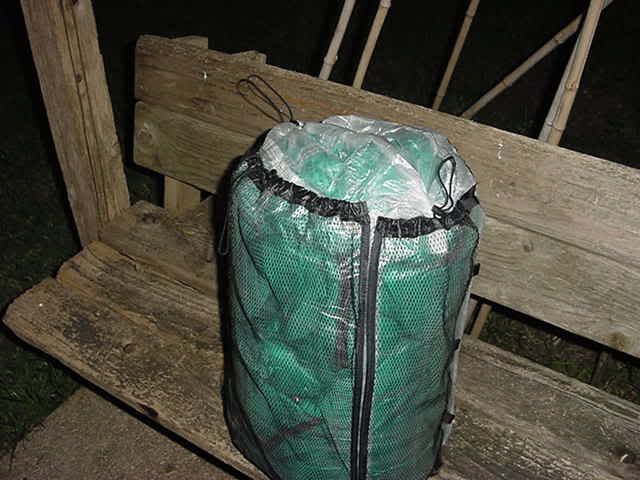
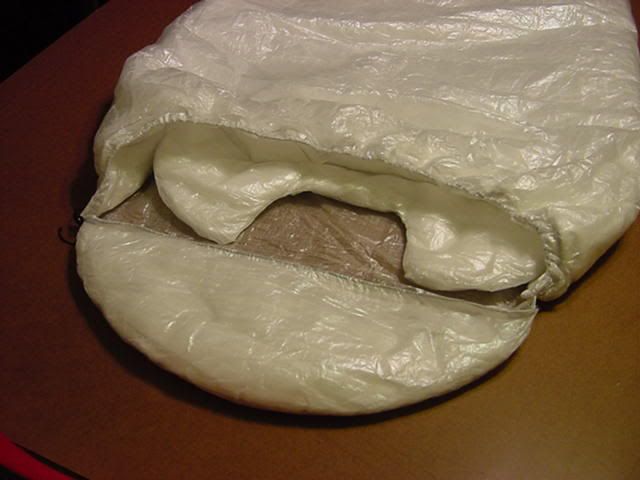
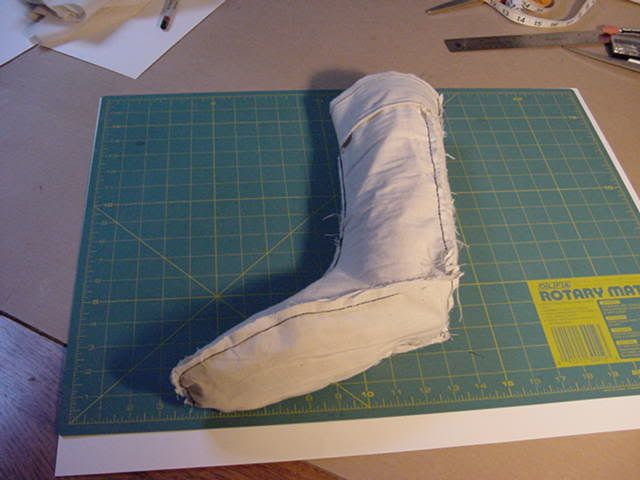
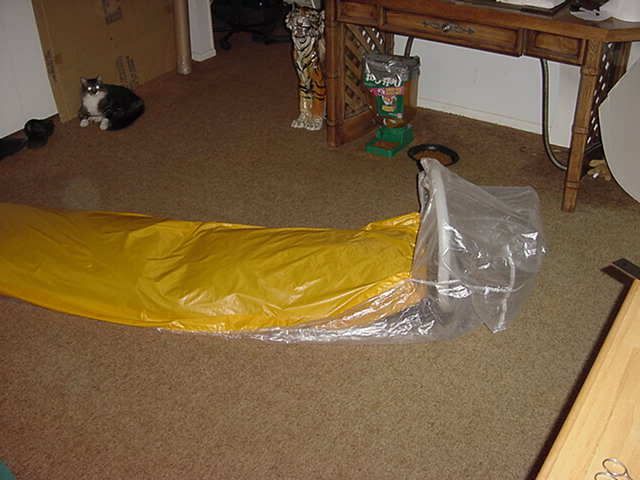
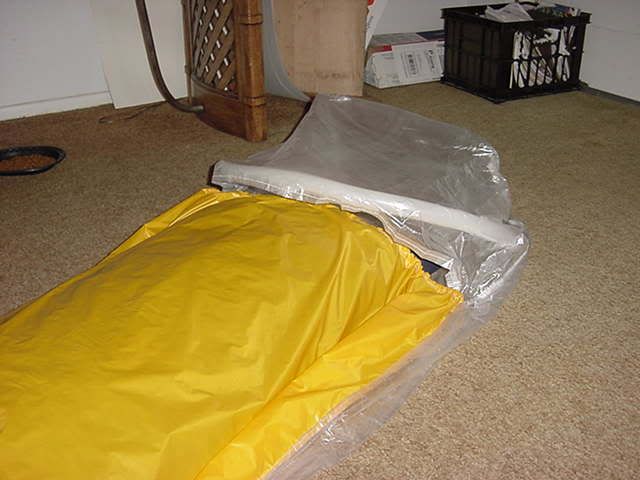
Part 2:
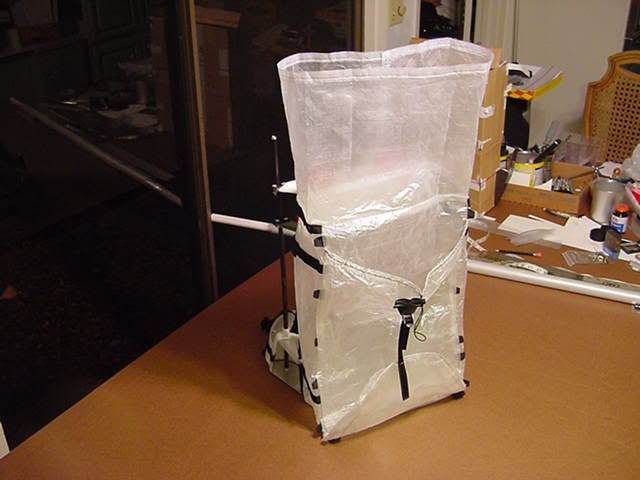
I finished the 10" collar for my SUL pack. I even found a way around the velcro issue. I didn't see how I was going to sew the velcro inside the mesh pocket easy and was tired. I did a cop out and since I have draw cords and neat little cord locks I just put the roll top ends through the loop and pulled the cord tight. It seems to work. I then just push the ends into the pocket. I will try this and see how it works.
The more or less finished pack weight is up to 2.10oz. I think I can live with that for awhile.
Lets see what is next on my list?
Cuben Material Project Number 2: (This project was finished on July 12,2005)
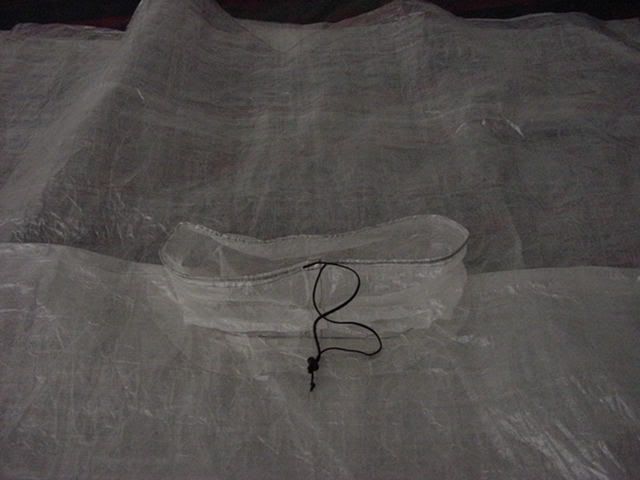
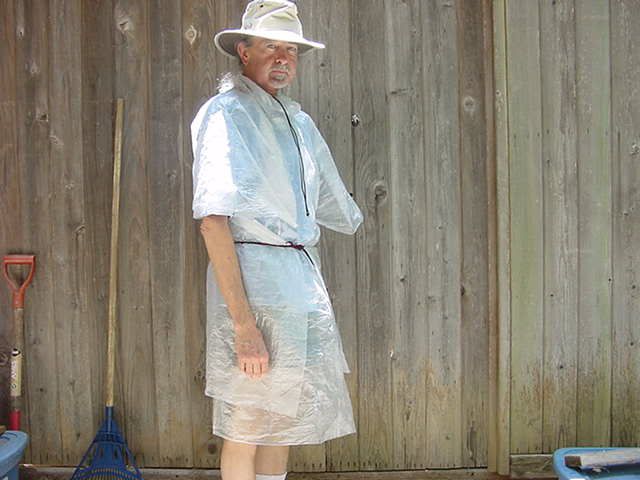
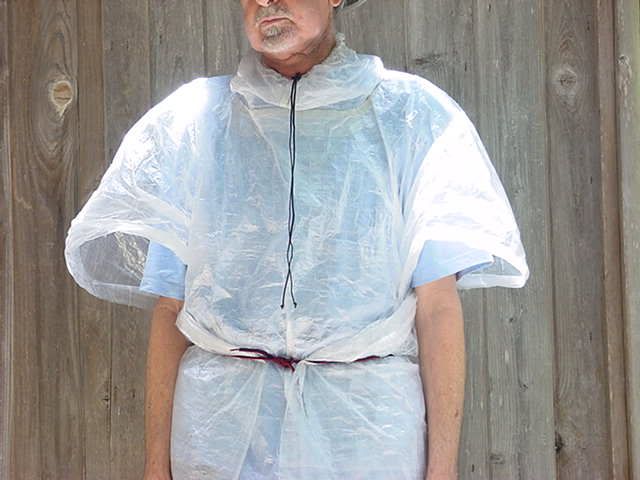
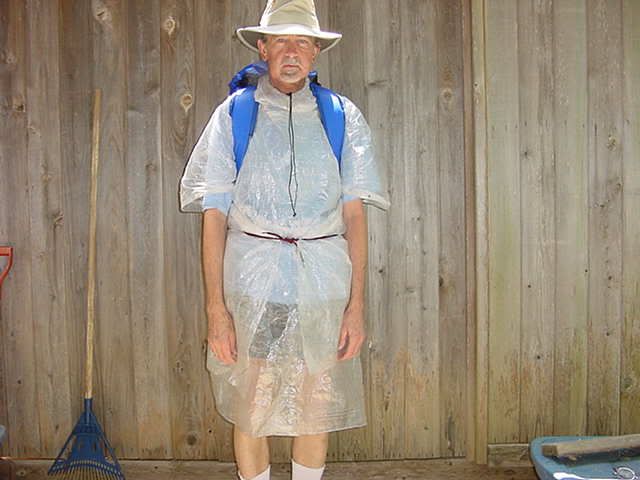
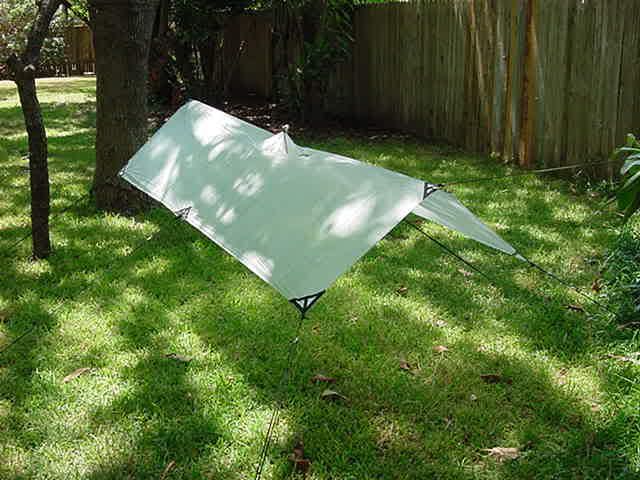
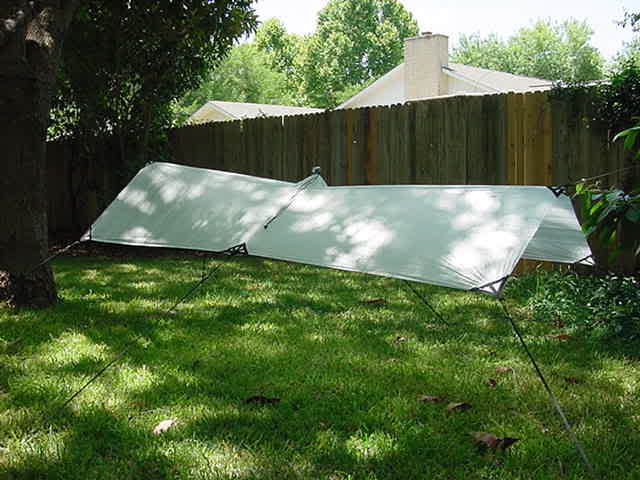
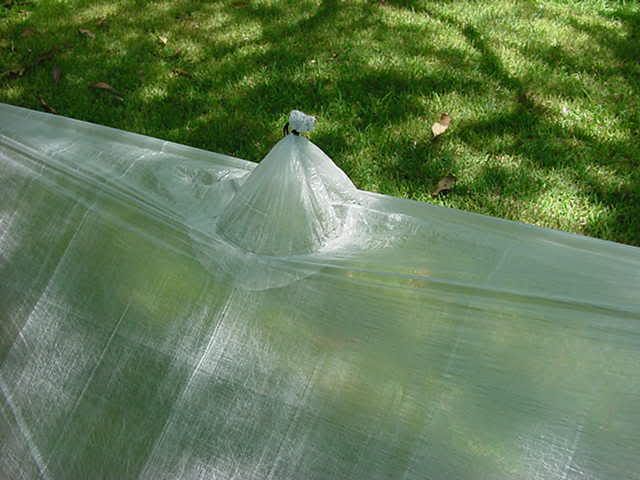
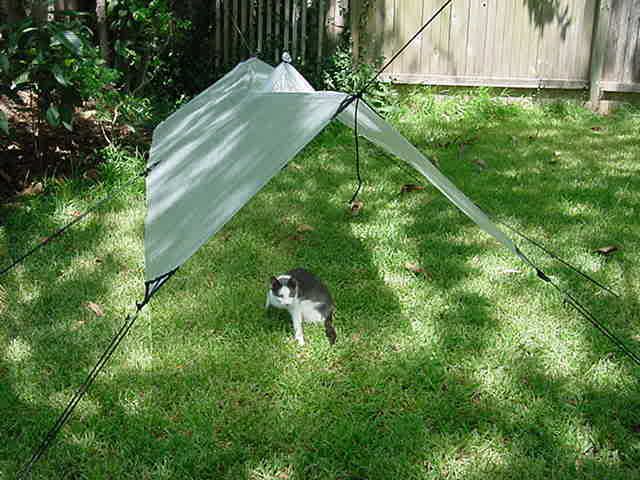
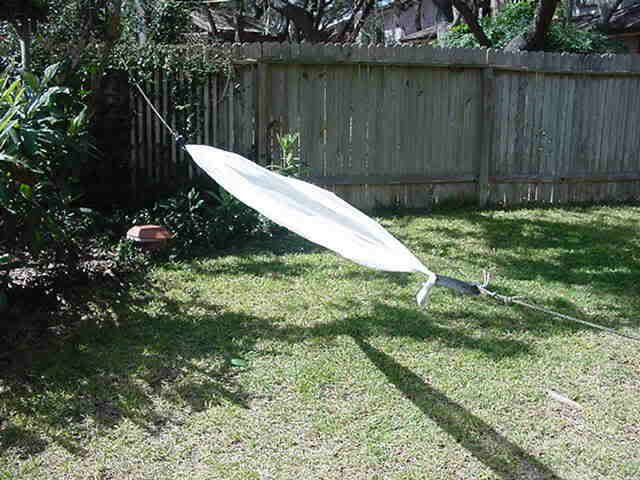
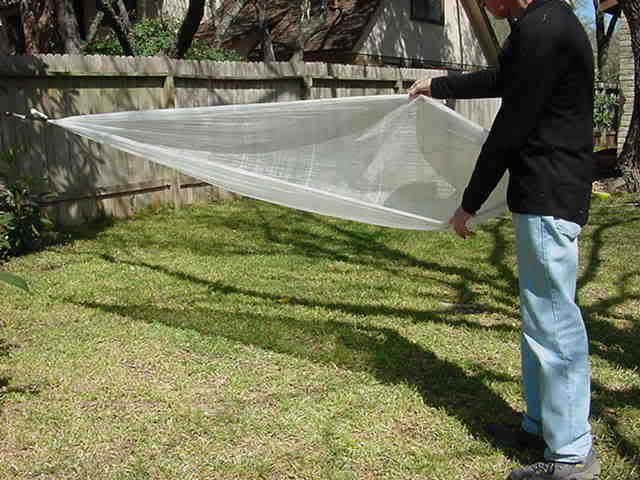
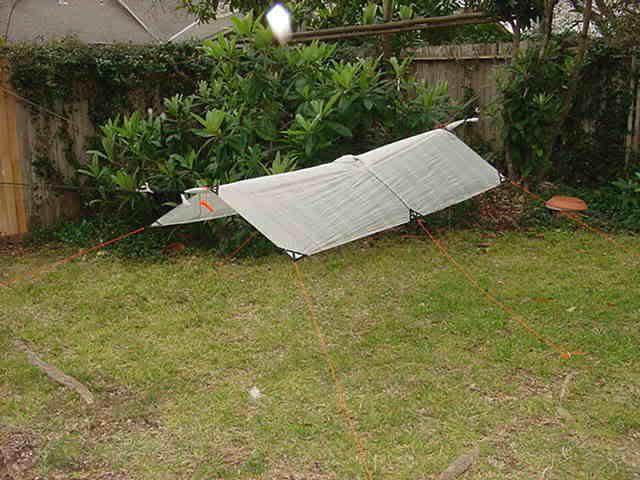
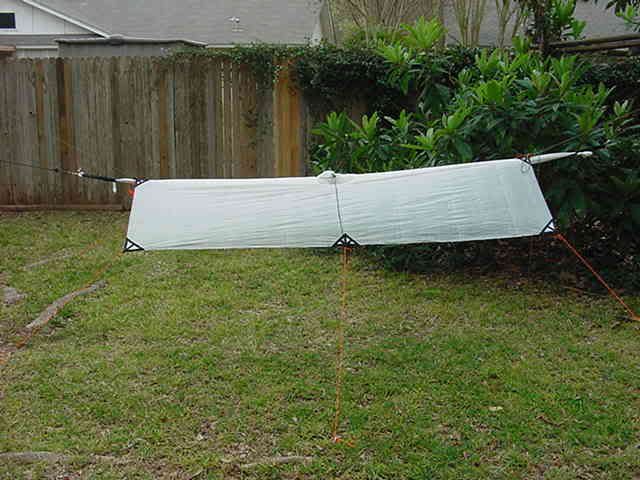
Super Ultra Light Poncho (2.81oz)/Tarp (4.99oz)
I have finished my first SUL Cuben Poncho/Tarp. It is 48" wide (that is how wide the Cuben fabric was) and 90" long. If I made another one I could keep the weight under 2oz if it was a Poncho only. The extra reinforcement necessary to turn it into a tarp added about 1oz to the weight.
The 2.81oz weight is for the Poncho mode only. In the Tarp mode it is necessary to add guy lines and stakes. 6 Vargo - Ti Shepherd's Hook UltraLight Stakes at .20oz each would add 1.2oz. 50 foot of AirCore Pro guyline and 6 tensioners would add another .98oz. This would give me a total weight when used as a Tarp of 4.99oz.
I plan to pitch the Tarp in different ways to see if it is big enough for my use. It sure looks small.
My plans are to do a short part of my Thru-Hike SUL and see how it works. The weather will play a big part in when I try it but it should be interesting to see what under 5 pounds would be like from Springer Mt. to Fontana Dam or so. Ideally it would be nice to start SUL and go that way as long as the weather didn't get crazy. As the weather gets warmer SUL should get easier.
As each piece of my gear gets lighter and lighter 5 pounds is starting to look like a lot of weight play with. Smart selection and layering of my clothing, even watching the weight, should allow me to stay warm for short periods of colder weather.
Poncho Mode 2.81oz.
Tarp Mode 4.99oz
Cuben Material Project Number 3: (This project was finished on Sept 23, 2005)
Part 1:
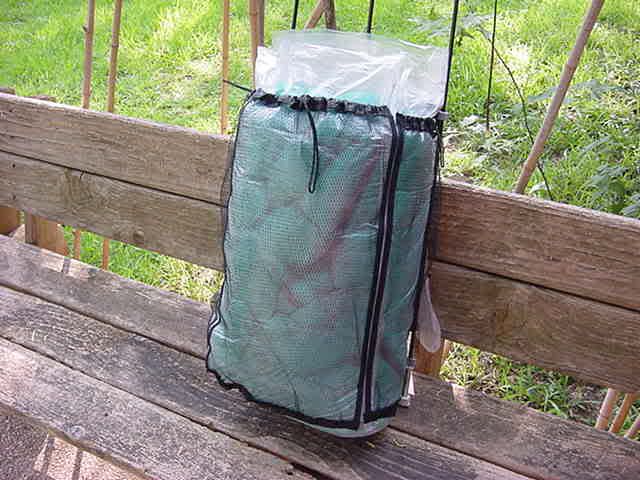
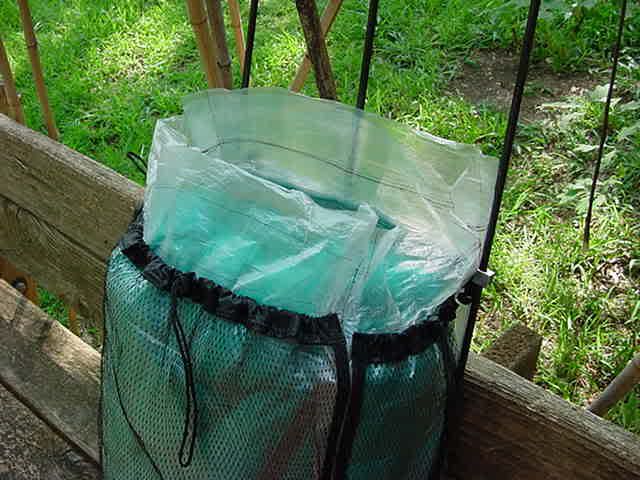
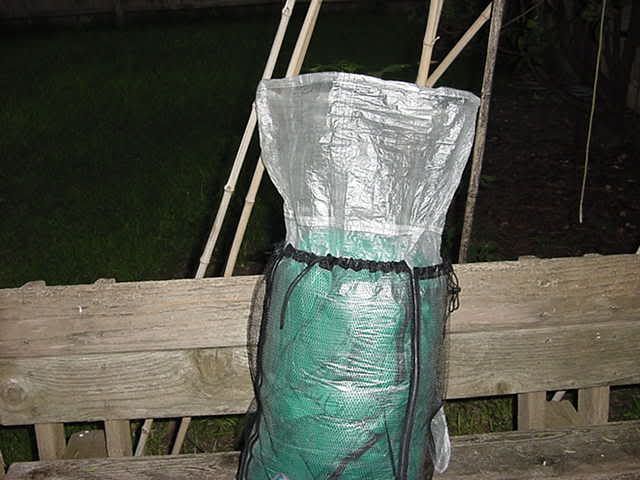
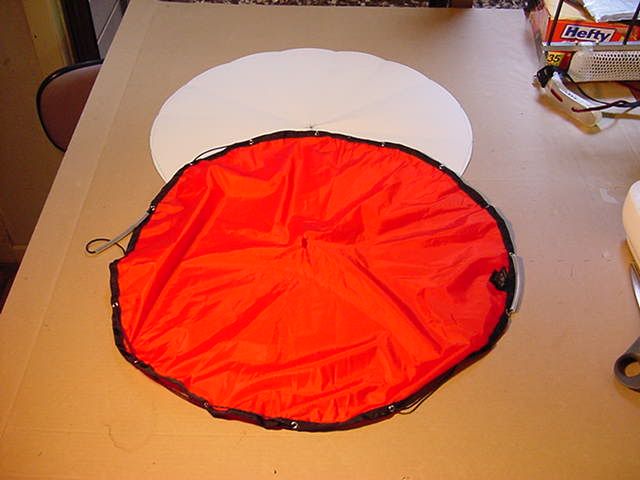
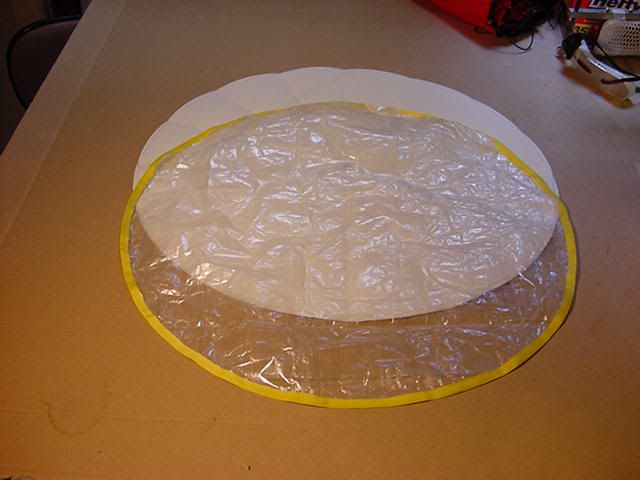
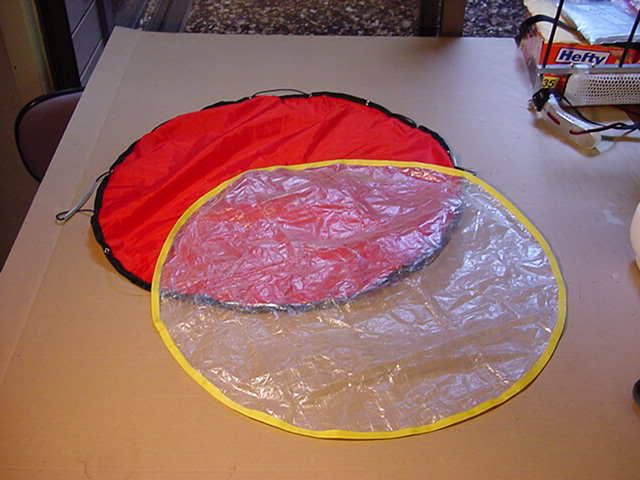
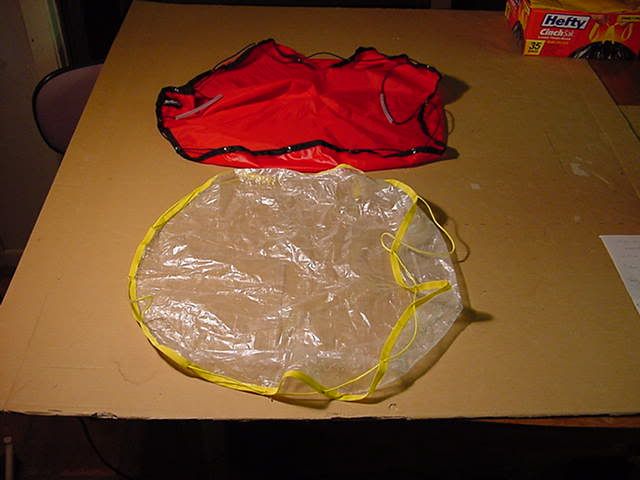
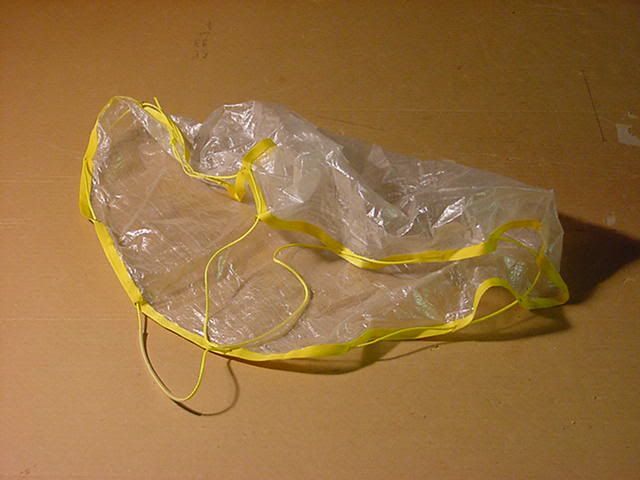
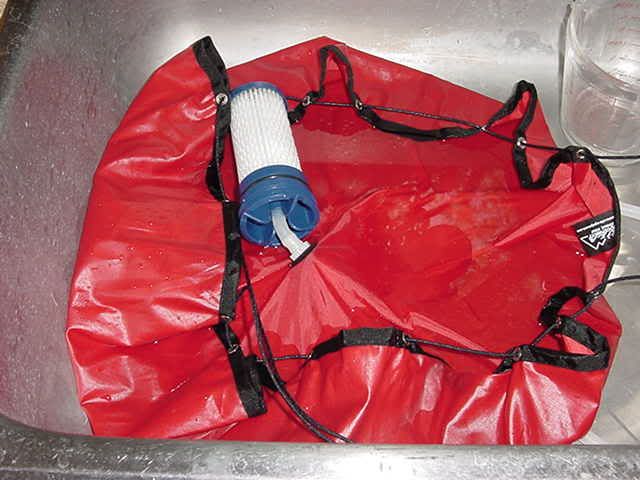
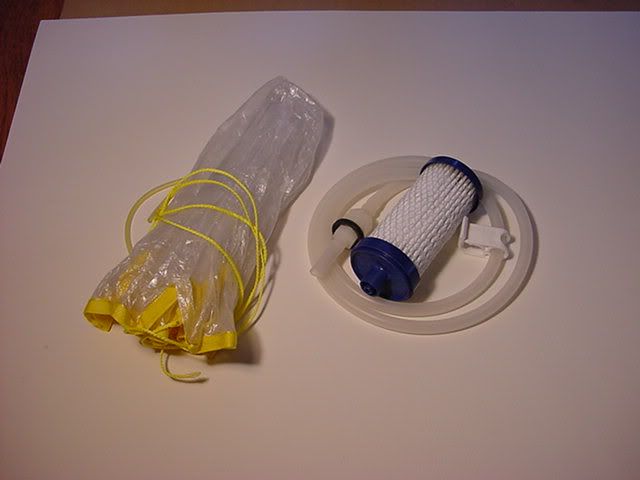
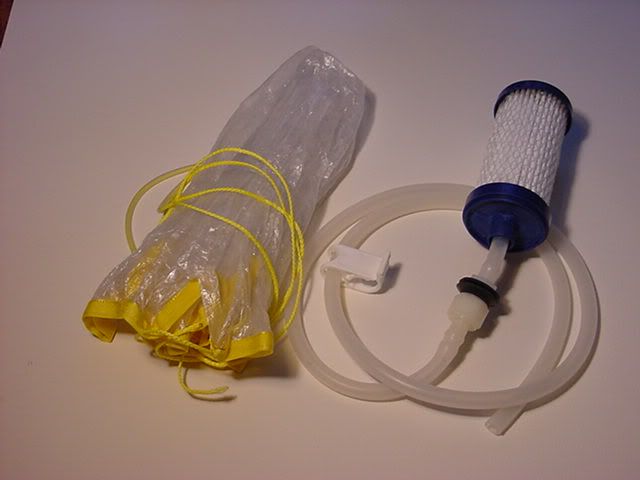
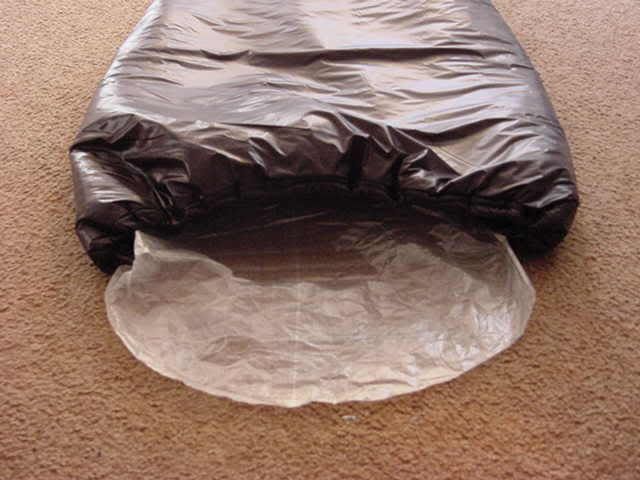
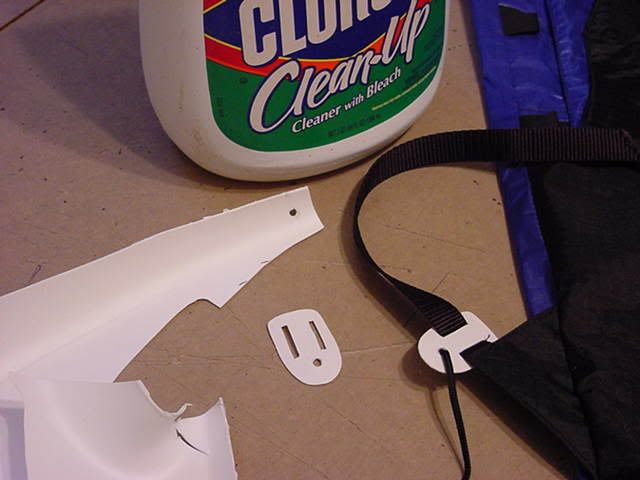
Cuben Water Bag Replacement for an - Amigo H2O Water Filter System:
I had a small piece of the Cuben fabric left over from my Pack Bag and decided to replace the Bag from my ULA H2O Amigo water filter with it. The ULA bag with the fittings removed weighed 1.96oz. The Cuben replacement bag weighed 0.57oz or a savings of 1.39oz. I will replace the ULA stuff sack with one made from the Cuben fabric as I have more scrap.
I will multi-use the tubing from the Amigo on my Platypus bottle and save another 0.23oz.
I wanted to use a piece of my "Yellow" AirCore Pro Ultralight Dyneema" shelter guyline from BMW for the water bag cord.
The yellow stuff is 3/4" grosgrain folded in half and pressed with a hot iron. I used the yellow so my colors would be the same. I then sewed around the outer edge of the Cuben material with the yellow grosgrain for reinforcement. Then I punched 16 holes in the grosgrain and strung the "yellow" AirCore Pro cord through the holes. I made the two Plastice Tube handles from two 4" pieces of the tubing from one of my feeding tube food bag sets and was done. Most any light weight plastic tubing could be used. As I said above the weight of the water bag went from 1.96oz to 0.57oz. A nice weight savings.
Part 2:
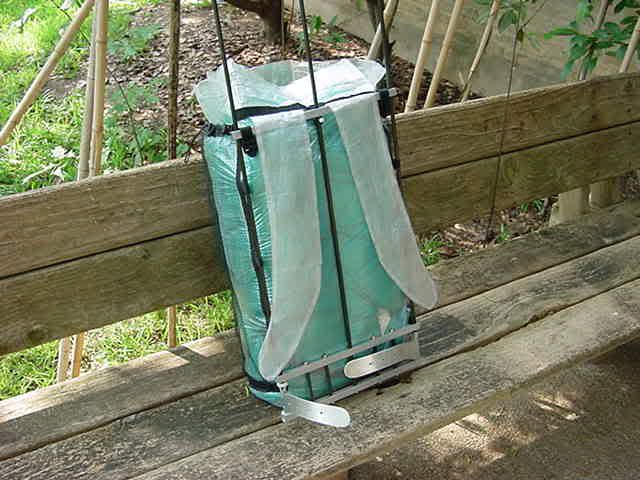
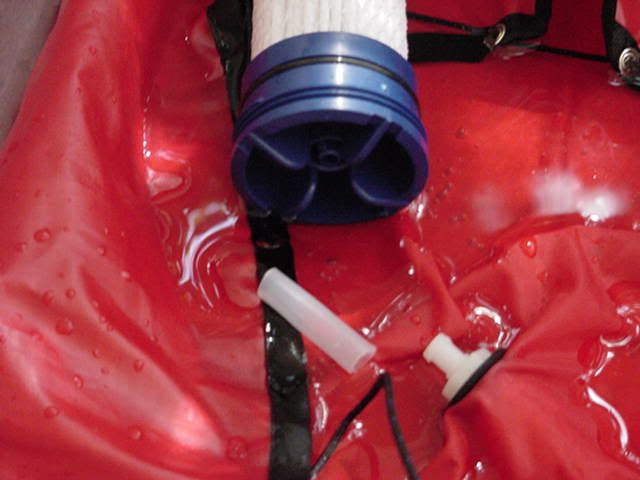
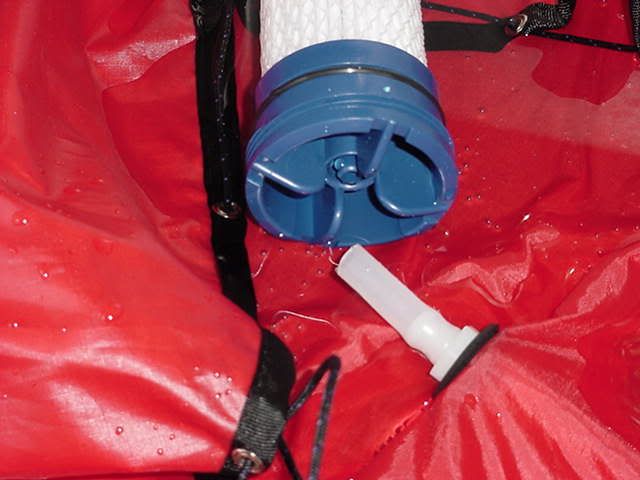
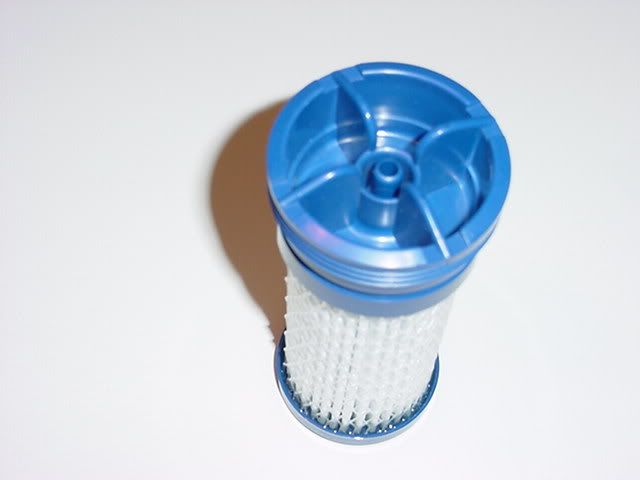
Filter Replacement:
There was a disscussion on the yahoo group - Backpacking Light about replacing the Amigo inline filter with a Katadyn Hiker Pro filter and put it inside the Amigo water bag. The Katadyn Hiker-Pro filter was said to filter water faster than the filter that comes with the Amigo. I had looked at the Hiker Pro filter but hadn't bought one to see if/how it could be used with the Amigo H2O Filter set-up.
I bought a Hiker Pro filter and it was really easy to covert the Katadyn Hiker Pro filter to my Amigo system. When the water bag has water in it and is held up or hung the filter seems to float upright and filters fine.
If you have an Amigo a look at the pictures should be enough to figure out what I did. If not ask.

Part 3:
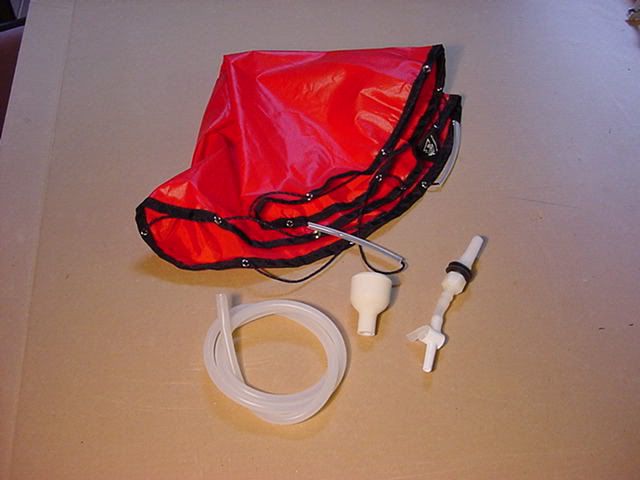
Completely New - Home Made Water Filter:
Cuben Water Bag/Gravity Feed Water Filter- 5.61oz
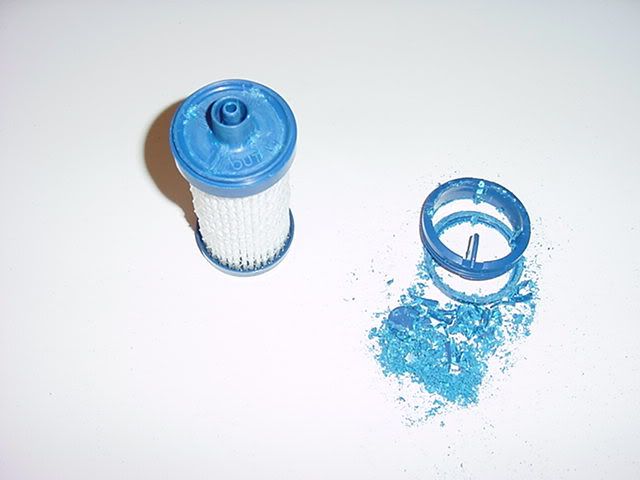
Back to the Hiker Pro for a moment. I just weighed my filter. I had to wait till it dried out. It weighs 3.62oz on my gram scale.
But as I was looking at the filter I had to ask myself why do I needed all the extra plastic around the screw part (Out-end). Why not cut off the extra plastic. I also removed the O-ring.
Stock Hiker Pro - 102.5gr/3.62oz
Cut Down Hiker Pro - 85gr/3.0oz
My Home-Made Water Filter:
Cuben Water Bag - 0.54oz
Hose's etc - 2.07oz
Modified Hiker Pro Filter - 3.0oz
==========================
Total Weight - 5.61oz
Weight of stock (Gravity Feed) Amigo H2O Water Filter - 8.82oz
Weight of stock (Gravity Feed) Katadyn Base Camp Water Filter - 13oz
Stock Hiker Pro Water Filter. (3.62oz)
Hiker Pro on a Diet. (3.0oz)
Note: I use an Orikaso Flat Fold cup to fill my water bag. I carry the cup anyway and it keeps me from possible damage to the filter bag.
===========================
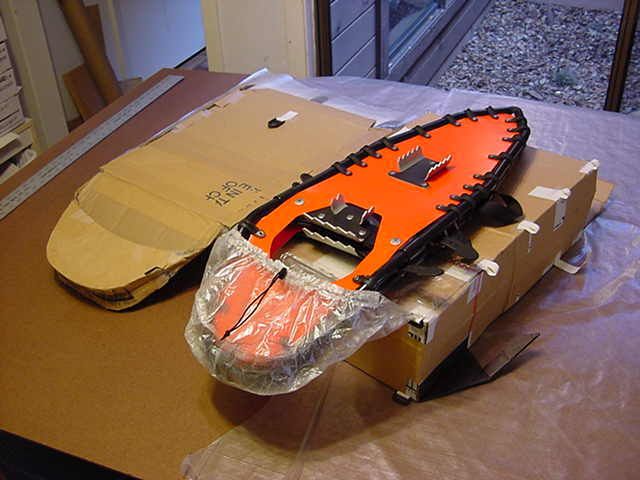
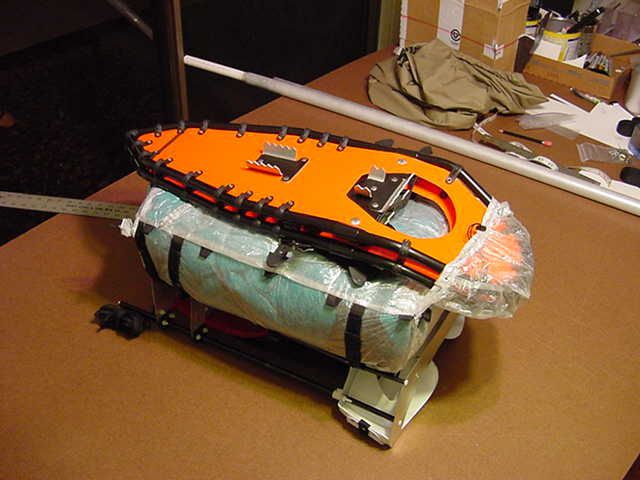
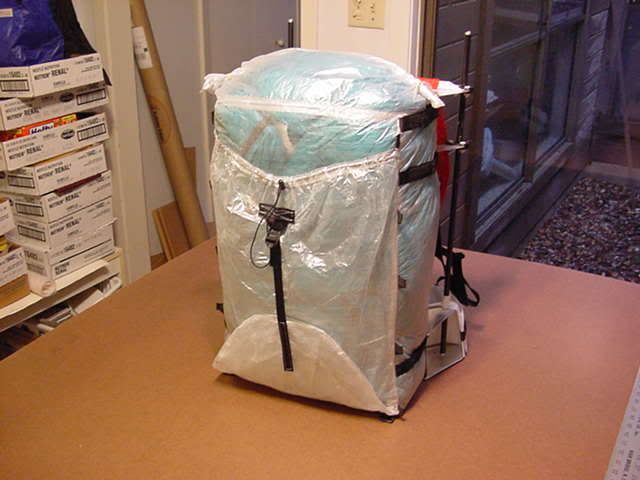
Cuben Fiber Pack Bag for a Winter Hike.
Finished Pack Bag weighs 2.54 ounces.
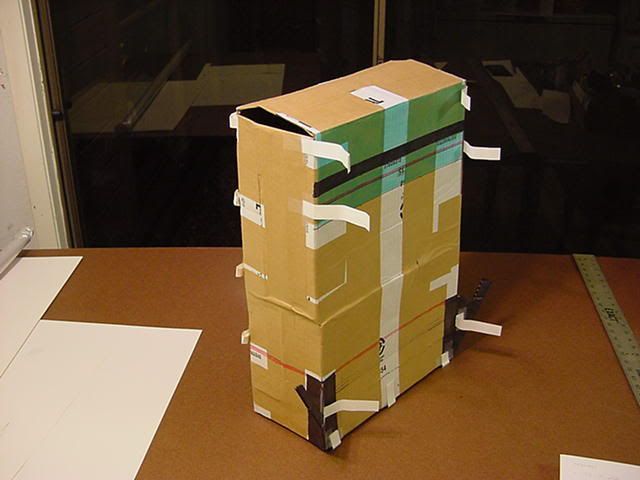
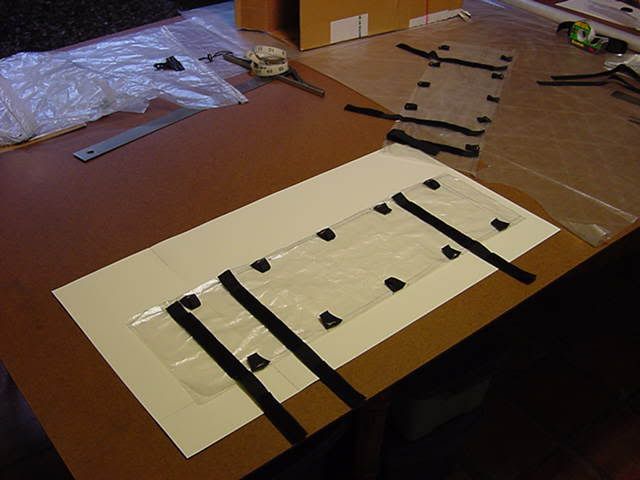
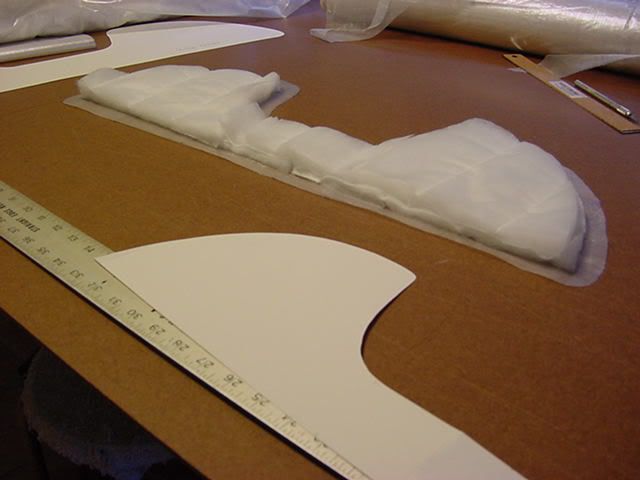
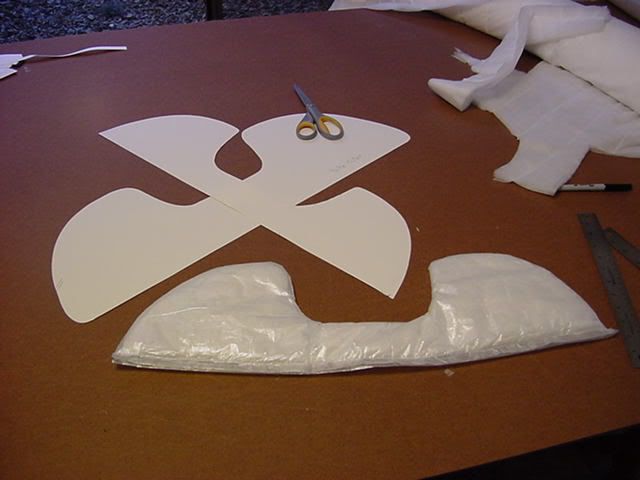
I start each pack with a full size mock-up.
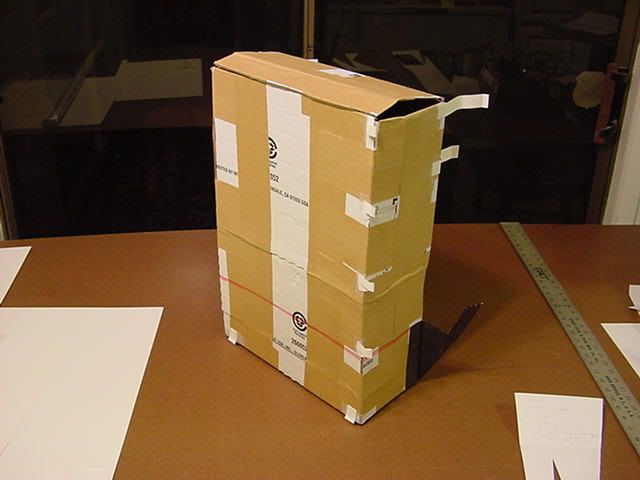
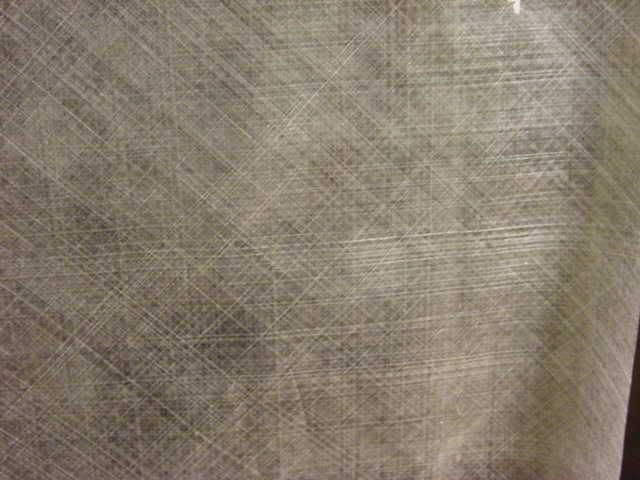
I am using a type of Cuben Fiber with a 4-way cord pattern. This fiber is really strong and still only weighs 0.49 ounces per squard yard.
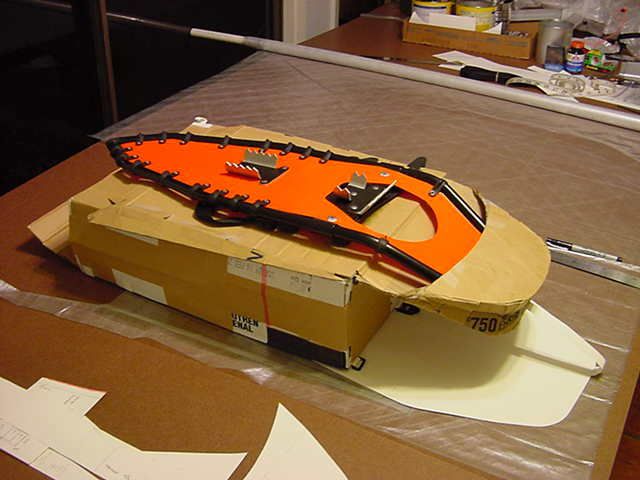
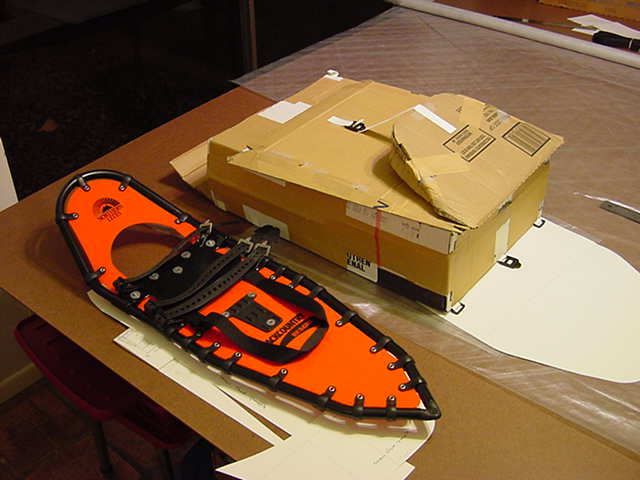
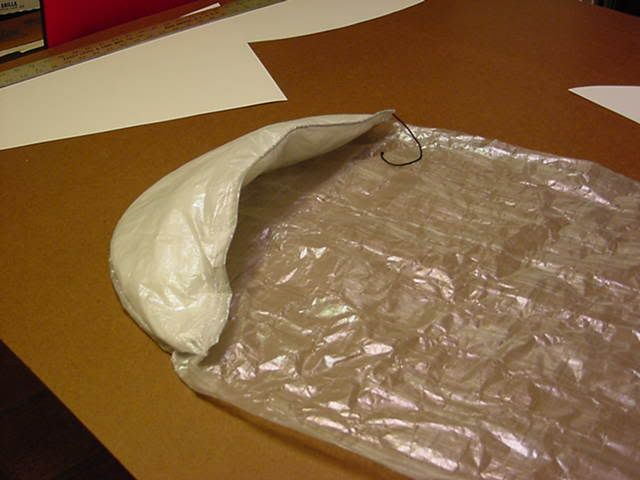
This is the finished "pouch" for my Snow Shoes.
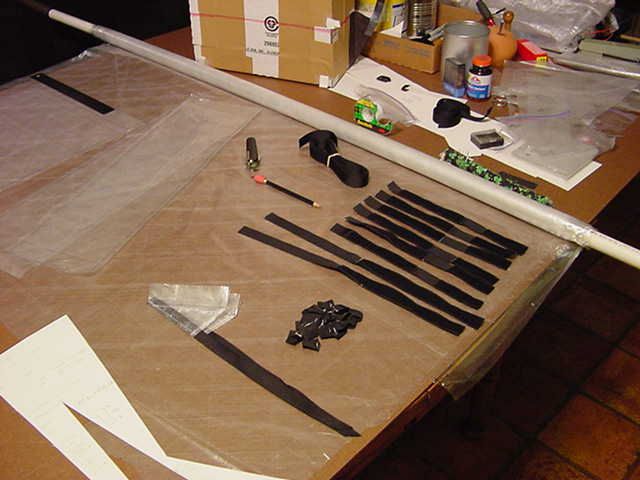
Lots of small parts go into a pack.
This is the packs front pocket with the "pouch" for the Snow Shoes sewn on to it.


Side panels for the pack.
The finished pack bag is 6" x 13.5" x20". The front pocket is 13.5" x18" x 2". The roll top is 12" tall.

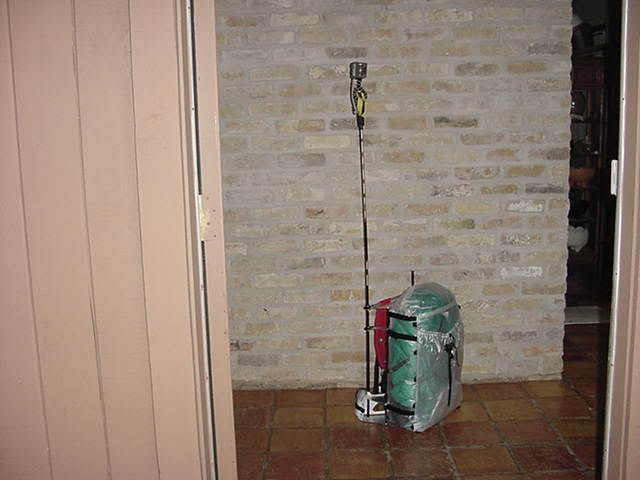
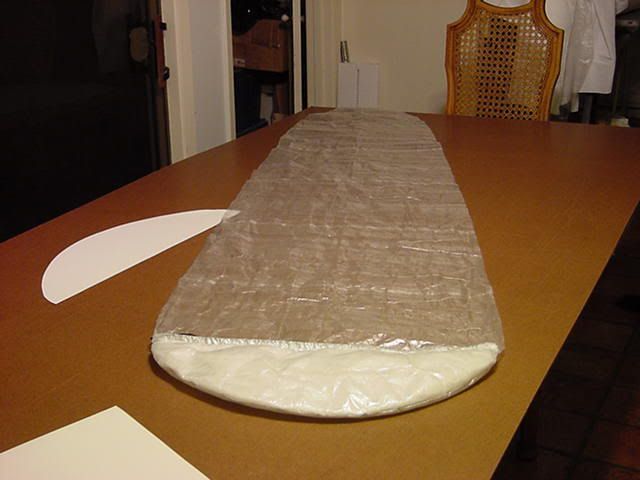
The pack with stuff in it and with the Snow Shoes attached.
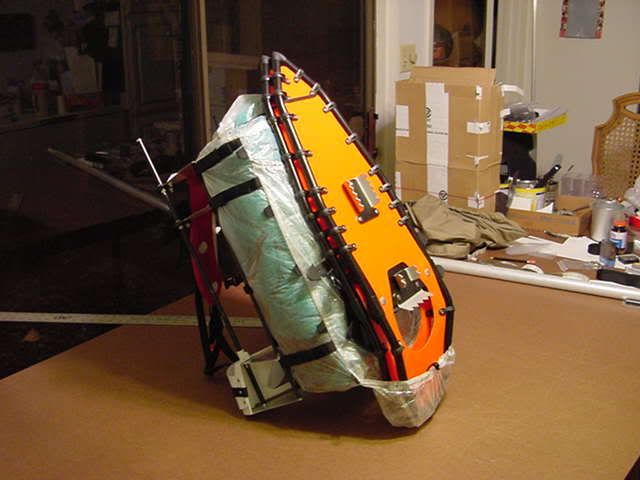
Cuben packs small and the Cuben Pack Bag weighs 2.54 ounces.
Questions and My Comments from another site:
pj - Robert - Phil:
Thanks for the nice comments.
I have a great computer(s) (3 - Apples) but don't have a Cad / Cam program. I would rather make a full size mock-up and attach all the loops, straps, hardware, etc and tape or glue them where I think I want them. Then I decide how and when to sew them on the pack panels. I try and figure out where and when to sew stuff together so it will be as strong as possible.
This Cuben Fiber is the strongest I have worked with so far. I have 3 other Cuben products that are even stronger. The price for the stronger Cuben fiber is in the extra weight. I have never had a problem with the lighter Cuben fiber. One of the packs I used on my GA Hike was made out of the very light stuff and some of same material this pack uses. The only pack I have owned that tore in a spot was from me doing a swan dive downhill after tripping over a hidden tree root. I fell on my side - on the pack - and ripped a tear in it about 7" long. My pack liner was OK and kept everything in my pack from falling out. I did put some duct tape on the tear and went on.
The real test will come on a long hike and may answer pj's question "Thru-Hike durability". I will have a back up for my Cuben items if I need or want to change stuff out. I will go to a smaller pack as soon as I am able to drop some of the cold weather gear.
Robert,
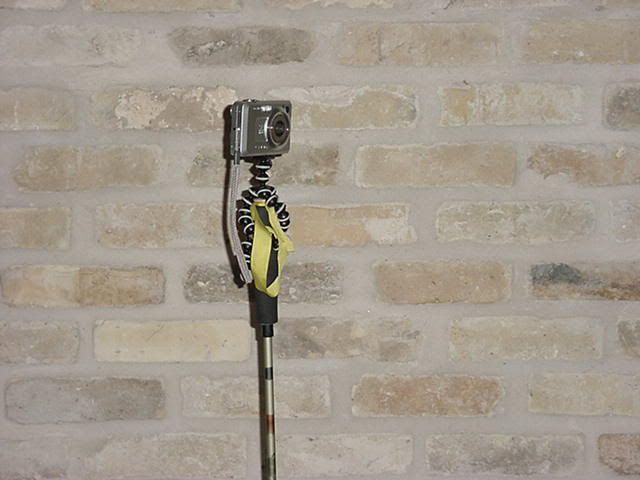
The frame doesn't morph into a tent - yet. I am still working on the frame but it will turn into a way to hold one of my trekking poles with my Gorillapod wrapped around the top of it holding my camera.
==========================
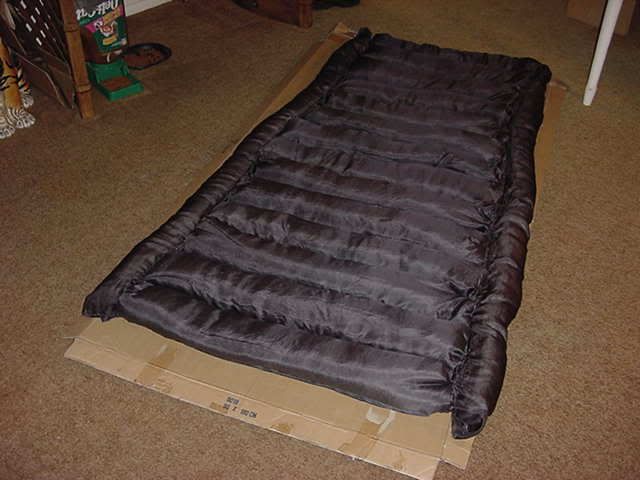
Cuben / PrimaLoft One - Sleeping Bag
Something happened this past week to cause me to re-look at some of the gear I planned to use on my up-coming hike. We had (for San Antonio) some very cold weather (down to 26 degrees) complete with a bad ice storm. On the good side it gave me a chance to try out some of my new MYOG stuff in the coldest weather so far this winter.
I was warm enough, but laying in my Bivy while it was raining ice pellets on my small Cuben tarp, gave me some time to re-think some of my gear.
Also last Saturday I received a VaprThrm NTS Shirt, VaprThrm Pants and a new pair of their VaprThrm Insulated Socks I had ordered this from RBH Designs. Over the last couple of days I have had a chance to wear the VB shirt and pants. I want to see at what "High" temperature they become to warm or cause to much sweat for ME to continue wearing them. Both the pants and shirt have the extra venting options. I have been surprised so far at the results. The temperatures for the 2 test have been 40 degrees and a light rain and 56 degrees and more or less clear. MY results might surprise you. My results of wearing the VB things also is one of the big reasons I am re-thinking what I carry.
Back to the Sleeping Bag. I used Cuben fiber for the inter liner of a new Down quilt I just made. It uses Pertex Quantum for the outer shell. The combination of these two materials has worked well. Using Cuben for both the outer shell and the inter liner was next.
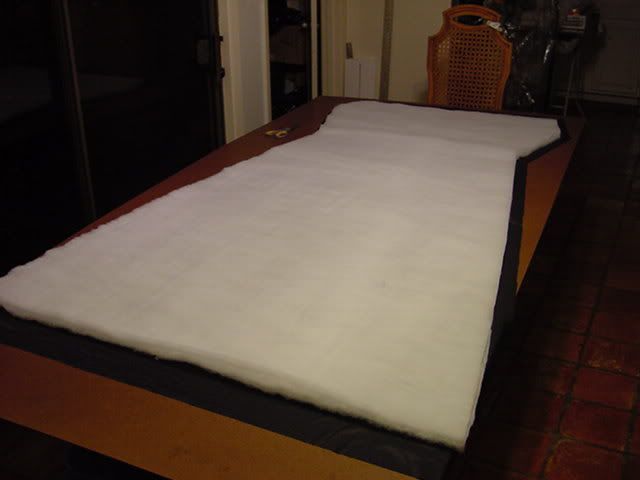
For my first, of several Cuben Sleeping Bags, I will use two layers of PrimaLoft One (pre-quilted) 1.8 ounce per sq yard insulation. The clo for PrimaLoft One is 0.84 and using two layer will give me a total clo of about 2.54.
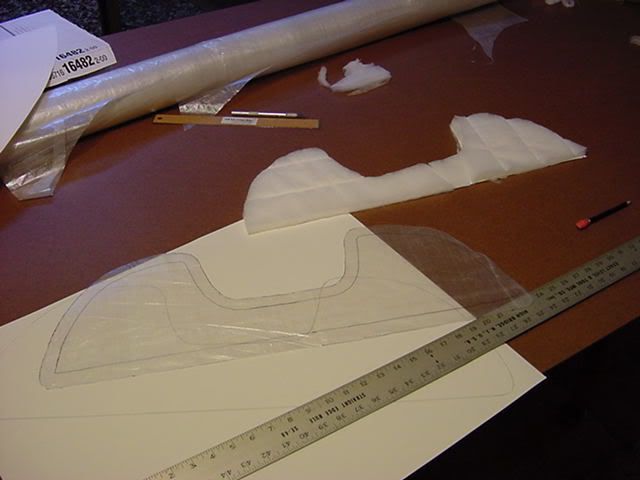
I started by making several sleeping bag prototypes until I had one that I liked. This is my final prototype.
Next I made a full size pattern.
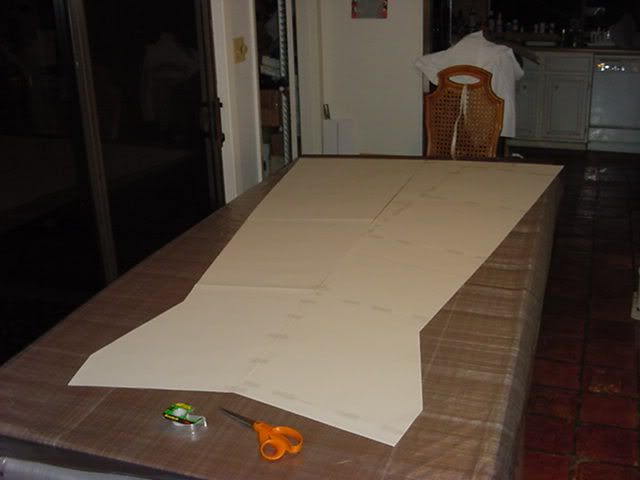
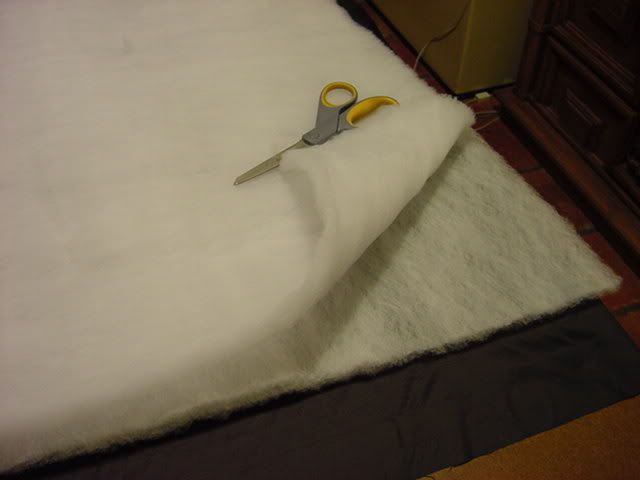
With a full size pattern cutting both the Cuben fiber and the insulation is easy. I expect to start sewing on Tuesday.

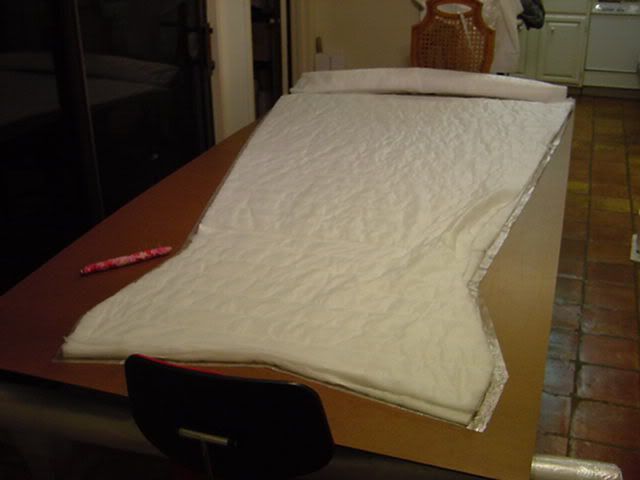
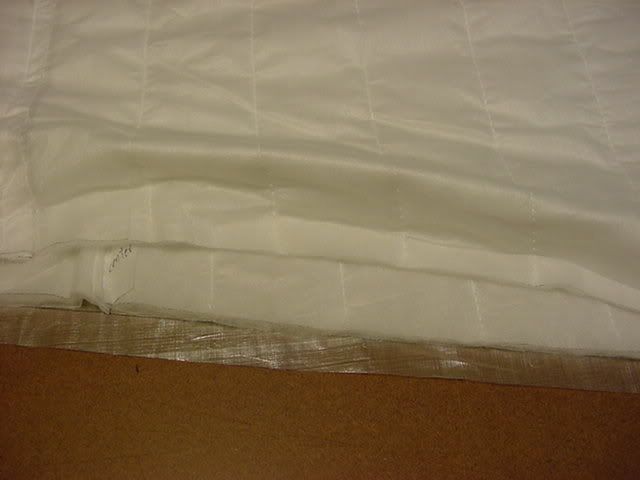
This picture shows how I overlapped the quilt seams. The insulation is on one piece of Cuben Fiber.
==============================
Cuben - PrimaLoft One/Sleeping Bag Part 2
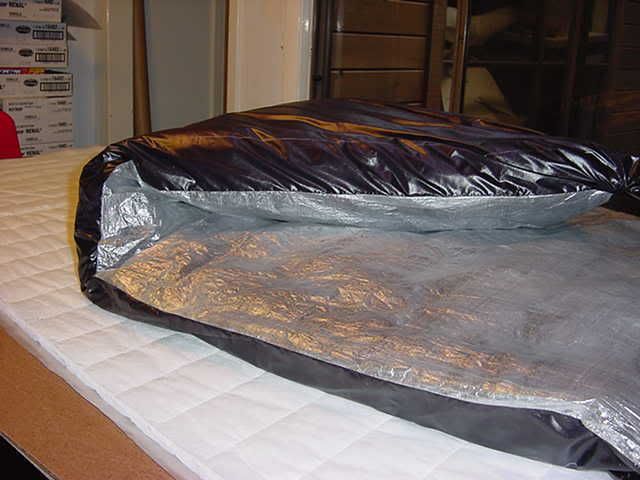
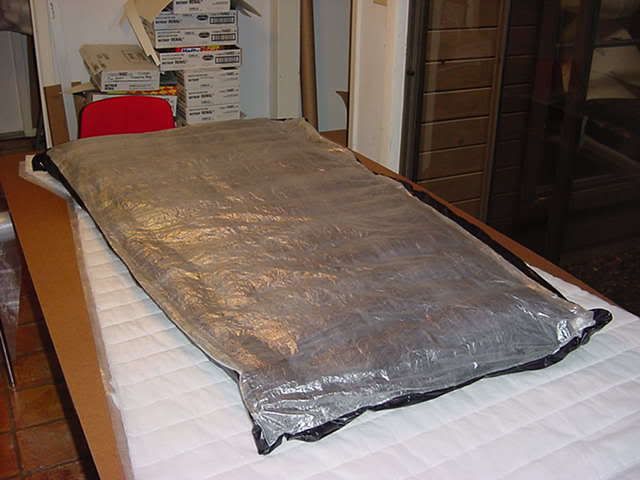
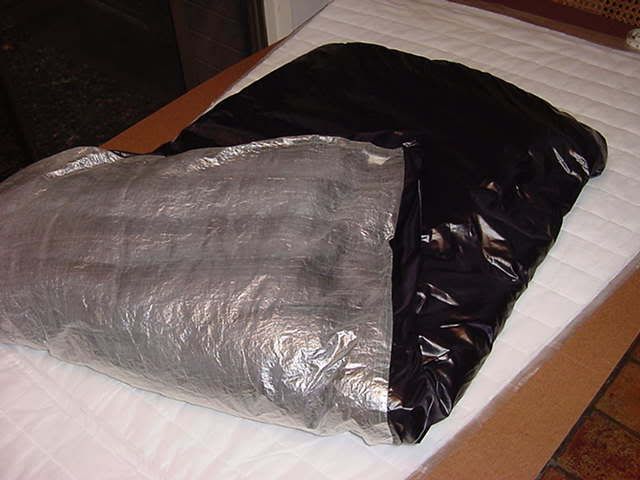
I think I can say I am finished with my Cuben - PrimaLoft One / Sleeping Bag.
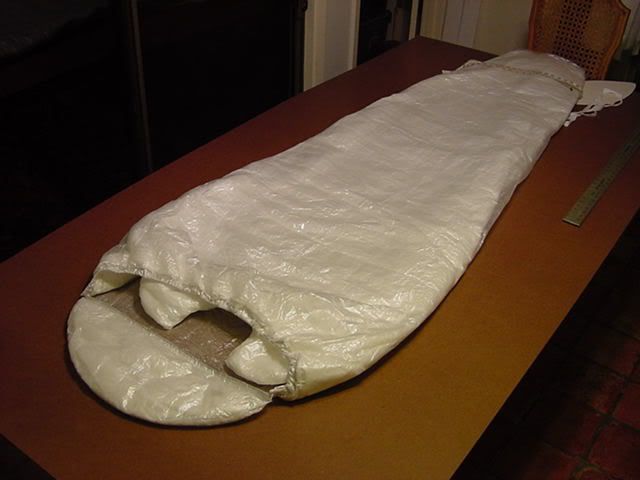
The bag is made out of all Cuben Fiber. The bag in its present size is 19.08 ounces. I say present size since when making it I added some extra length to it. When I made my last prototype I lost some of its length. The non-insulated insert for the bottom is tapered and when I sewed it to the rest of the bag the taper pulled in the sides and made it shorter. I added 10 inches to the length just to make sure it wasn't short. The current length is 89 inches. I will decide how long I want it but I am thinking about 80 inches. When I do this I think the weight will go down to 18 ounces.
The bag uses two layers PrimaLoft One (Clo of 0.84) 1.8 ounce per sq yard pre-quilted insulation in the main bag. This gives me a total Clo of 3.02. I made a small hood for the bag that uses 3 layers of the same insulation. I also made a neck yoke and used 4 layers of insulation in it. I have elastic in both the hood and the opening of the bag. The bag is made to slide into. The circumference of the top part of the bag will open to 64 inches. The foot end (if cut at 80") will be 38 inches. The insulation is stabilized to the inter piece of Cuben so the shell has no seam lines to leak.
Yoke
Hood and Non-Insulated Bottom
Finished - Sleeping Bag after trying it out. The sleeping bag is made of 2 layers of PrimaLoft One - 1.8 ounce per sq yard pre-quilted insulation. The bag part has a total Clo of 3.02.
"Edited" Rolled up for packing.
Detail of Neck Yoke and Hood. The Neck Yoke is 4 layers (Clo of 6.04) and the Hood is 3 layers (Clo of 4.53) of PrimaLoft One - 1.8 ounce per sq yard pre-quilted.
==============================
Cuben / Pertex Quantum - Down Quilt
I wanted to make a Down Quilt with a lot of Down in it. What I ended up with was a Down Quilt with between 4" and 4.5" of loft. It looks a little bigger than my typical quilt size. The Down Quilt is still made to go into my Bivy. It is 40" across the top, 32" at the bottom and 70" long.
It uses self-contained silk baffles - think silk quilt.
This means it is made to go inside a cover much like a comforter cover you might have a bed. The cover top is Black Pertex Quantum and the bottom is Cuben Fiber. By making it this way I have no sewing lines to leak water into the Down. The foot end can be opened to remove the silk quilt part if it needs to be washed or aired out.

I have used the finished Quilt on my bed for a week to see how the Cuben worked. It work so well that I am now making a Sleeping Bag completely out of Cuben - Inside and Out. I also used this Down Quilt inside my Bivy last week - outside on a icy night - when the temperature dropped to 26 degrees (F). I was very warm. How could you not be warm with 4" plus of Down on top of you.
This photo was taken before it was put inside the Cuben - Pertex Quantum shell.
============================
Cuben / Pertex Quantum / Climashield Combat Sleeping Bag.
I started this sleeping bag yesterday afternoon. Using the pattern from the all Cuben Sleeping bag saved a lot of time and I was able to finish the Sleeping Bag this morning. I did not make a hood or a collar for this bag so that saved a little time and weight. The opening has a circumference of 70 inches and the foot end of the bag has a circumference of 30 inches. The bag is 80 inches long. The opening has an elastic draw cord.
The shell material is Black Pertex Quantum and weighs 1.03 ounces per sq yard. Momentum90 from Thru-Hiker.com would be a great direct replacement for the Pertex Quantum if I couldn't get the PT-Quantum.
I used a panel of Cuben Fiber (0.42 ounces per sq yard) for the non-insulated bottom part.
The insulation for this sleeping bag is two layers of Climashield Combat. My insulation weighs 2.13 ounces per sq yard. The Clo for Climashield Combat is 0.79. This gives me a Clo number for the two layers of 3.365. This is more or less equivalent to 3.365 inches of loft (think Down) for temperature range planning.
Weight of the Pertex Quantum: (1.03 ounces per sq yard)
1 layer of PT-Q = 2.91 ounces. 2 layers required = (5.61 ounces - trimmed weight.)
2.91 ounces = 2.83 sq yards of material x 2 = 5.66 sq yards of material.
Weight of the Cuben: (0.42 ounces per sq yard)
1 layer for the non-insulated part of the bottom = 0.53 ounces.
Weight of the Climashield Combat: (10.39 ounces)
Clo for 2 layers of Climashield Combat - 3.365 = 3.365" loft +/-.
Weight of the shell (2 pieces of PT-Q. the 2 layers of Climashield Combat and sewing them together) = 453.6 grams / 16 ounces.
Total weight goal was 17 ounces.
Total Weight is 473.4 grams or 16.7 ounces.
This shows the two layers of Climashield Combat insulation.
The finished Sleeping Bag.

This shows the Cuben Fiber non-insulated bottom insert.
Materials:
Shell Material:
Pertex Quantum - Not available for retail sales.
Momentum90 - Direct replacement
Cuben Fiber
Cuben Fiber
Cuben Fiber
Insulation:
Climashield Combat
OR
Climashield XP
Hardware:
Tiny Cord locks
Shock Cord
===============================
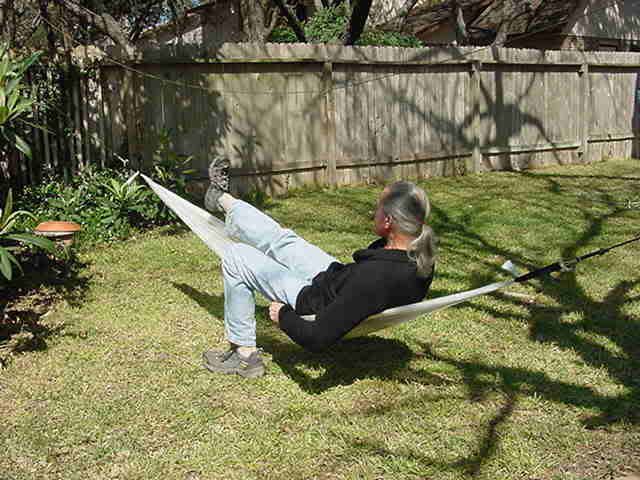
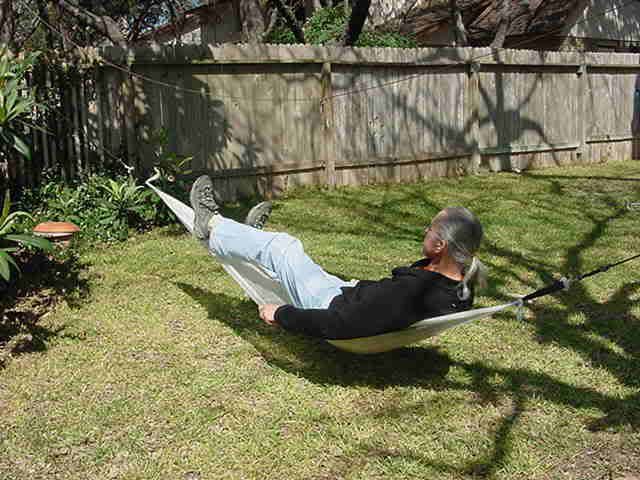
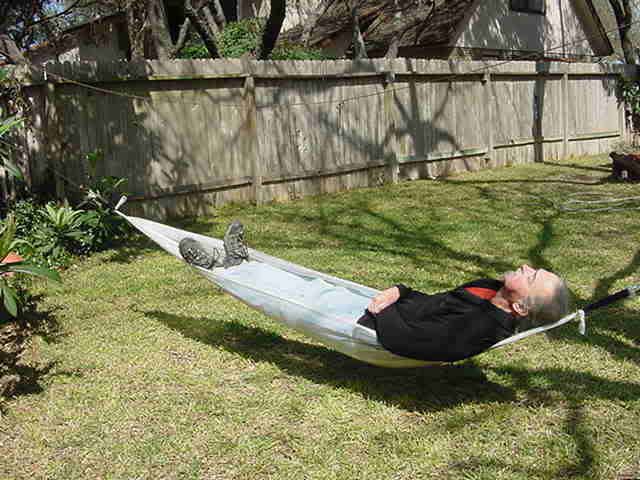
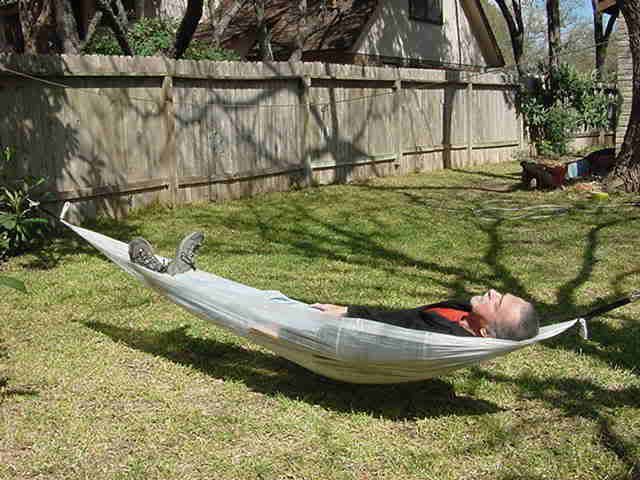
Cuben Fiber Hammock - 6 March 2007
Ever since I bought my first yard of Cuben Fiber I have thought about trying it for a Hammock. Since it now looks like half or more of my AT Hike this year will be during the warm season and maybe also the rainy season I have decided to find a SUL way to move into a Hammock.
In the past it seemed to me that sleeping in a SUL Bivy and using a light sleeping pad of some kind along with a Poncho / Tarp over head was the lightest way to go. I have several light Hammocks made out of silk but they are still in the 12 to 14 ounce range and they still need a tarp of some kind for rainy nights. Using Cuben Fiber for both the Hammock and the Tarp I should be able to get real close to the ground set-up. I am hoping to use the Hammock without a sleeping pad so that will save me 5 to 10 ounces. If I do have to use a pad it will be smaller for the Hammock than if I was on the ground.
I don't know where the fine line will fall when it comes to total weight between the lightest ground vs hammock set-up but I expect I will find out.
This is Cuben Fiber Hammock ver. 1.0. The Cuben Fiber I am using is just a little heavier than what I like. It weighs about 0.47 ounce per sq Yard. The Cuben Fiber for the Hammock weighs a total of 2.36 ounces. The fiber density of this material is very high so it should be more than strong enough. Time will answer that question.
The Black webbing is the kind Ed Speer Hammocks uses on his line of Hammocks and will sell the webbing to anyone that wants to make their own Hammock. The small aluminum fittings are some I made to connect a short piece of the black webbing to the Hammock and to connect the white cord to. The black webbing and small aluminum fittings weigh 0.85 ounces. The white cord is a 3/32" Spectra core low stretch something from West Marine and will go from the aluminum fitting to the tree. I will use tree huggers and the white cord will attach to the tree huggers.
I am going to try and take a timed picture with me in the Hammock after I have used it awhile. I don't want to run and jump into this one till I have a few hours laying in it.

The knot holds the Hammock in the webbing.

Weight to date:
Cuben Fiber for the hammock body - 2.36 ounces
The two pieces of black webbing and two small aluminum fittings - 0.85 ounces
The white cord from the black webbing to the tree - 16 foot at 0.05 ounces per foot = 0.85 ounces
Tree Huggers - Speer Webbing - 2.89 ounces a pair
Total Weight Hanging for ver 1.0 = 6.95 ounces
I will try and nap in this hammock for a while everyday to test its durability.
Materials:
Cuben Fiber
Cuben Fiber
=============================
I have added a few more pictures with a bit more detail. I also was able to beat the 10 second timer on my camera and was able to get a few pictures of me in the Hammock.
12 ounce Coke can next to he Cuben Fiber hammock.

Holding the Hammock open.
Racing the 10 second timer on my camera.
=============================
I took a couple of daylight pictures of my Cuben Fiber Poncho / Tarp and Cuben Fiber Hammock.
What you can't see in the pictures is rain. We were having a light rain so I went out and got into my new Hammock. I wasn't sure how the small Cuben Fiber Poncho / Tarp would work. Laying in the Hammock the light rain picked up to a heavier rain. This went on for about 30 minutes and then slacked off a bit. The Hammock sagged enough with me in it to drop it down under the small size of the Poncho / Tarp. Once in awhile I would get a blowing drop of rain or two. When the wind picked up I pulled the Cuben Fiber from the sides up a bit around me and I stayed warm and dry.
While I was laying there watching the rain fall, I got several ideas to try that may let me use this small tarp with a couple of light weight and minor modifications. The modifications will be add ons so I can use them or leave them off.
=============================
Cuben Fiber - Rain Pants - 1.2 ounces
My current SUL Gear List has had a pair of Cuben Chaps on a "To Make" for awhile. I also have wanted to make several clothing kits from Thru-Hiker.com. I have had one of their
Minima Vest Kit and last week got both the
Liberty Ridge Shell and
Liberty Ridge Pants Kit.
I decided to use the Liberty Ridge Pants pattern for a pair of Cuben Fiber Rain Pants. The pattern is very easy to use and making the pants went fast.
The Liberty Ridge pants come with lower side zippers to make them easy to get on and off. I decided to use sew-on snaps as they would weigh less than a set of zippers. I have 4 snaps on each leg. My rain pants open up 19" from the cuff up toward the waist - this is at my knee.


=============================
Cuben Pack-1.5 ounces
Made - 09/24/2006
The pack is 5.5" x 11" x 18" with two side pockets. I expect to use this pack for a Sub 2 pound hike in October 2006.
I used two different weight Cuben Fibers. The more or less standard light product CTO.3K.08 which is about 0.35 ounce per sq yard and CTO.3HBK.08 (4 cord) and about 0.5 ounce per sq yard. You can tell the difference in the pictures. The lower part of the pack, pack straps and reinforced areas are the heavier fiber.
I was asked for a copy of my pack pattern:
Sorry, I don't do patterns.
A pack is just a box shape made to what ever size I/you need or want. I make a full size cardboard mockup. I add everything to the mockup such as side pockets, reinforcement spots, any loops I might want etc. When I get it like I want my real pack to be I take the mockup apart and use the pieces for my pattern.
The small black tabs along the edge of the pack are for running a compression cord.
This pack is for my Sub 2-lb, Sub 3-lb and Sub 4-lb gear list. To decide how big I need to make any pack I first lay out everything that might need to go into it. For the Sub 2-lb pack I made a cardboard box to us as a guide. I also want to use the pack for a Sub 3-lb and Sub 4-lb gear list if possible so I made it a little larger. I then made 4 pack bags of different sizes out of Wally World $ a yard stuff. The mockup for this pack seemed to be about the right size. The compression cords will give me a lot of options. I have also added a way to attach something like a small water bottle to each shoulder strap.
I really like an external frame for my pack. It is very hard to avoid the " sweaty back syndrome" with the frameless or internal style pack. It is just hard to make an external frame and pack bag light enough for a Sub 2-lb gear list for use during cooler weather.
I just came back from a 2 mile walk with about 8 pounds in my new pack. It will workout OK as my eating plan is to stop every 90 minutes and eat about 280 calories. This eating schedule will give me a bunch of short breaks and let my back dry out if necessary during my hiking day.
I have added a couple new features to my new Cuben pack. I added a sternum strap and attached 4 small "D" rings to the webbing. I also added a small plastic fitting to the bottom end of the webbing for the shoulder straps (shows up white in the picture. I have a small piece of cord attached to each fitting so I can use it like a "Hip-String" belt if I need to.
The pictures show the pack with 9 pounds in it.

I have a couple more things I want to change on the pack and will make a new one when I get back from my hike. One thing I have planned is to lower the sternum strap. For me it is a little to high up. That changes with a lighter load and if I can I would like to make one that will slide up or down a little.
My Hip-String - I have walked about 10 miles using it. With a pack this light (my expected hike pack load is between 7 and 8 pounds) I thought I wanted a way to control any movement at the bottom of the pack. It adds almost no extra weight and I like it tied better than lose. I have done the same thing to my slightly modified G6. My G6 is under 3 ounce. It has several modifications and I have a few more planned.
=============================
Cuben Footies-VBL's-0.22oz a pair
Made - 10/29/2005
I have been working on a pattern for a Foot VBL made out of Cuben Fiber. I first made several muslin patterns to get the right size for my foot. Tonight I finished my first pair out of Cuben Fiber. I expect to try a couple more pattern ideas but this pair will give me something to wear and see what happens.
The pair weighs 0.22oz and are 10" tall. I wear a size 11 shoe.

=======
The theory is that the VBL goes next to the skin with the sock on top then my shoe. In this case my trail runners. When I made a sleeping bag VBL out of really light spinnaker ripstop I sewed in a light silk inner liner for your reason.
I do however, have room for a thin sock in my Cuben Footie's. I have always used a Rocky Gore-Tex bootie in my trail runner when it rains or when I expect heavy dew or a lot of creek crossing where I will get my shoes wet. I wear my socks then the "Rocky's". I also carry a little foot powder and that helps some to a lot.
I have a prototype for a pair of insulated full shoe gaiters to be used with my trail runners. They will attach to the full top of the trail runner but leave the bottom of the trail runner uncovered. They also are 10" high. My hope is to extend the use of my trail runners without using something like an overboot safely into the 0 to 20 degree range.
The combination of the foot VBL's and the insulated gaiters will give me something to test with.
======
Cuben material is normally sold in a "panel" of just over 9 yards and is about the only way they will sell it. If they happen to have a smaller piece they will sell that but they will not cut a "panel" for a smaller amount. They are getting a lot of phone calls from us folks in the backpacking world about their material and want to make it easier for us to buy it. We are a new market for them and I expect they will have a few growing pains till they/we adjust to our needs/wants. They have been really nice to me and are commited to serving our material needs.
=============================
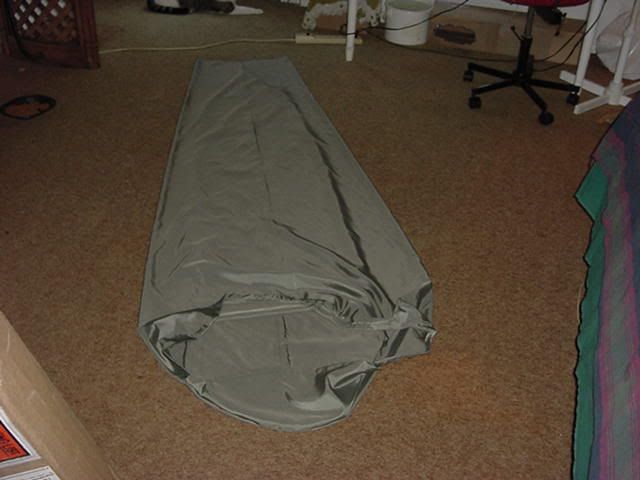
Cuben Fiber - Pertex Quantum Bivy
Made - 09/07/2006
Part 1.
Using the dimensions of my "Bozeman Mountain Works Vapr Bivy Sack" (Pertex Quantum) size Long, I am making one out of Pertex Quantum and Cuben Fiber.
My Bivy is full size as I have not tried to downsize the dimensions for this project. I will not have zippers or bug netting like my BMW Vapr Bivy has. I will use a draw cord at the lower opening like I think Ryan did on his modified NANO Bivy.
Weight so far:
Pertex Quantum - 2.32 ounces
Cuben Fiber - 0.86 ounces
These weights may go down after sewing and trimming. I left extra material at the top end as I don't know how much extra I might need to sew a box like end at both the top and bottom. I will practice making a box end on a few small stuff sacks before I sew the Bivy.


Part 2
I began sewing my Bivy this afternoon. I have the draw cord sewn into the neck opening and have sewed the lower two pieces together. The "box" end wasn't as hard as I thought it might be. The top part should be sewn in this evening and that will finish the Bivy.
The weight of the Bivy as you see it is 2.68 ounces.
I am going to use Cuben for the small top piece and that should give me a finished Bivy at or just under 3 ounces. If the Cuben doesn't work after a good test I will cut it off and replace it with more Pertex Quantum.


Question - "Aren’t you concerned about the durability of cuban fiber especially for a bivy floor?"
Answer - No,
I will still use a light ground cloth and the Cuben Fiber is stronger than most of what is used for the bottom of really light Bivies. Nothing is puncher proof. Check out the NANO Bivy here. I am real sure it is some Cuben product. I expect the same one I am using.
This Bivy is for my Oct hike and I just needed to get it done. It is just a little smaller than my BMW Bivy. I will be using this one in cold weather to help extend the range of my "stay warm" stuff. It is also a part of my stay warm system for my Sub 2-lb, Sub 3-lb and Sub 4-lb gear list. I am trying to see how light I can go for a winter gear list and still be warm enough.
I am going to make several more and have a number of design ideas. The drawstring foot opening is part of one of them. I think I have read about you doing this and believe it is a good idea for warmer/rainy weather.
I am going to try Cuben for the hood area on this one and see how that works. If I don't like it I can cut it off and replace it with more P-Quantum.
I have been inside the Bivy and the size is about as small as I can go for my size and height and get my quilt and/or sleeping bag into it.
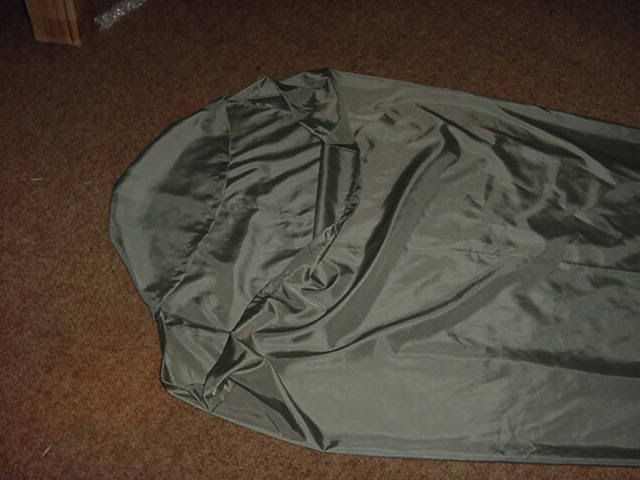
My Pertex Quantum / Cuben Fiber Bivy is finished. It weighs 2.82 ounces.
A few pictures of what I have been doing today:
Adding the Draw Cord and Mini-Cord lock

Cutting the Cuben Fiber:

Sewing the last seam:

Finished Bivy:

Bivy with a long balloon to hold the hood up.
Folded size - 4" by 4.5" by about 1.5" - book for scale.


I sewed a placed for a draw cord in the front of the Cuben hood but will try it without first. I just wasn't sure I wanted to be that closed up inside the Bivy. I liked the idea with the balloon to keep the hood away from my face/head area but still close over me if I wanted to do that. I also played with a wire to make a hoop of sorts to do the same thing the balloon does. I have an OR Advanced Bivy that uses two hoops in the hood part. It is Gore-Tex and you could sleep out in rain with it and stay dry inside. Getting out in the rain was another story. I went to a small tarp like thing to cover the top 1/3 of my body.
I have several ideas for a hybrid sort of bivy that I want to make for next years Spring rains. If any of the ideas work I will be able to give up the tarp and save a few ounces.
The cord on the lower part of the bivy hits me about at my neck line.
Remember this bivy is for cold weather and if necessary I have a BMW bug net.
I was asked about using tape for the seams:
I have the 3M tape and have used it on small things. I think it is a lot of trouble on a long length. For me to use it more I would want a second set of hands. The sail makers use a special "Hot Glue" gun and special glue. One of those would make big things much easier and I would expect a better seam. The special Hot Glue gun is about $1600 and then you have to buy the glue and gun cleaner stuff. To much money for me just doing a few things for myself.
Before I start with a new fabric such as with the Pertex Quantum or when I am sewing two very different types of fabric I play a lot with scrap. I run a lot of different combinations of stitch length and stitch width. I am learning as I go but my seams are looking much better than my first sewed items. For the standard I look at my G6 and the BMW gear I have. I would like to be able to watch the sewing part of who ever makes their gear.
I use Gutermann Thread from Quest Outfitters and good needles. I ended up with a stitch length of 2 and a stitch width of 2 on the Bivy. Sewing machines are different and you need to do some testing to see what you machine setting might need to be.
The bivy will pack down really small. I may get to the point that I don't need much of a pack.
You are correct that I am using a balloon. I have a lot of balloons and had these 1" x 60" little guys. They only weigh 1.1 gram each. The only bad thing about them is I need my 1.75 ounce balloon pump to blow them up. I tried blowing them up by mouth and can't get them started. I have tried blowing them up with the pump first and then blowing them up by mouth. I can do that but not easy. I may have to blow them up a couple of times to break them in some. I don't want to carry the balloon pump just to blow up one balloon each night.
I am working on a couple more ideas for balloons and if any of them work I would need the pump. The pump is modified from a starting weight of 2.8 ounces down to it current weight of 1.75 ounces.
The balloons look a little funny but they work, they pack to about nothing, they weigh about nothing, they are cheap and I can recycle the used ones into "finger" sling shots and have fun shooting at shelter mice.


I used CTO.3k.08 on the floor and hood. I think the product numbers have changed but not the web site yet. The weight of the CTO.3k.08 is the 0.33 to 0.35 oz per sq yard.
I thought about using a balloon to hold the hood open and away from my face. Sort of like a little tent with a big door. I have learned how to blow up a balloon so I don't need a balloon pump. I also learned how to tie a slip knot so I can untie the balloon easy and use it more than one time. The balloons weight less than 3 grams each ( I found some stronger balloons) and for a hike with a resupply schedule of 3 to 5 days I would only need to carry one balloon for the Bivy. If I am using my home made balloon bed the balloons are the same size so I will always have a couple of extra balloons if I break one.
The Pertex Quantum is also 3 times heavier than the Cuben fiber. I think we fuss way to much about condensation but If condensation becomes to big a problem on a given night I can push the hood back and out of the way.
Testing will see if this works. If it doesn't work I can always cut the Cuben hood off and replace it with Pertex Quantum.
I have an old OR Advanced Bivy that uses 2 hoop poles. The system had worked very well for me but the poles were to heavy for this Bivy. I had a long piece of Ti wire like BMW sells but just longer. The Ti wire was border-line to light for the Pertex Quantum hood. That was another reason I went with the Cuben Hood. I had been playing with the small balloons for a different project and thought try the balloon for the hood. A balloon worked well and held the hood up really nice.
I am working out the details for version 2 of the Bivy. It will be designed for use in rain and maybe even snow and will not require a tarp. It may be heavier than this Bivy but lighter than a Bivy and a Tarp used together. It is looking more like a baby solo tent when set up. Using a really good and light WPB fabric, Cuben fabric and a couple of balloons or something that inflates I hope to stay well under 5 ounces.
If this new Bivy design works in snow then I can use the weight saved for more insulation in another Quilt/Sleeping something and maybe get a Sub 2 or 3-lb gear list that will work below 32 degrees or maybe lower.
The person I buy my balloons from I have a friend earns a little extra money by dressing up like a clown and doing parties. I called him about getting some balloons and went to pick them up yesterday. He said not many people can blow up the small ones but most can learn how to blow up the bigger ones. So for about 30 minutes he shown me how to do it. I can blow up the 360's and even though they are a little bigger they will work for the hood of the Bivy. They also are the same size as the CheerStics so they will replace the CheerStics in my Kilt / Air Pad Shell. When I blow up the 360's for the Air Pad I will tie them off at about 24" long. He also showed me how to tie a sort of slip knot that I can take out easy. With the stronger balloons and the slip knot I know I can use them more than once. His balloons are stronger but not heavier (3 grams each) than the ones I had been using from Hobby Lobby.
I have had a chance to use the bivy for 6 nights on my Georgia Hike. Most nights were a little windy and I kept my head inside the hood area. When I thought about it I tried to keep the hood open a little. It never got bad enough to try the balloon idea. I did get a few condensation drops one night when I was real close to a river but never enough to worry about. I think the breeze blowing through my tarp set-up most nights may have helped. The weather which was cool and dry might also have helped. I slept on the ground with just a ground cloth two nights - no pads just the soft leaves - stuff - etc.

posted by gardenville @ 9/17/2005 06:43:00 PM
![]()
12 Comments:
Nice, but if you have it for general use, how will you sterlize the fold flat cup after using it to fill the filter bag?
Thanks very much for the ideas here!
Not sure I'll go the cuben fabric route, but for me it was a very fast and easy way to save a little weight cutting the excess plastic off the Katahdin filter with a bandsaw. Mine looks pretty much identical to yours after surgery, but mine now weighs 2.7 oz (76 grams).
For anyone else trying this, I was happy I had wrapped and taped some thin plastic around the filter part while I did the cutting as there was a lot of dust created.
Greetings - great trailblazing work with Cuben. I am curious though how you deal with hems/seams or do you even need to bother with the material. Have you tried bonding seams with some adhesive at all yet?
tnx - john - colorado springs
tnx - john.
I have tested a bunch of different types of tape with Cuben. The first thing I do is put it on a piece of scrap Cuben and see how much it weighs per foot. The tape is heavy vs the weight of thread. On something large like a tarp the tape may weigh more than the Cuben Fiber.
I have never had a problem with my sewn seams.
Bill,
I really enjoyed meeting you at the Hiker Hostel last week. I feel that I was at the knee of the master for a class on Ultralight gear. I want a slightly larger cuben backpack than you carry. Do you have plans or patterns that I could use? Where is my best place to get the cuben?
loyboy,
It was really great seeing how much your kids were enjoying hiking and how tuned into lightweight gear they were. I had really nice weather in the Smokies - for 3 days. That was OK it has always rained some whenever I have been in the Smokie. I am going back this fall after the leaves drop.
As for a bigger pack bag you might want to look at this Blog entry:
http://ultraliteskunkworks.blogspot.com/2007/01/cuben-fiber-pack-bag-for-winter-hike.html
It is a larger Cuben Pack bag and but still only weighs about 2.5 ounces. This one is made for a frame but it could easily be made with shoulder straps. The pictures show how I make the bag from a cardboard mock-up. When I am happy with the size I then use the mock-up for my pattern.
Quest Outfitters.com has 2 different weigh versions of Cuben that they sell by the yard. The heavier one isabout 0.47 ounces per sq yard and should be good for what you want.
Hi, I was wondering why you did 2 layers of insulation for your sleeping bags. I am making a quilt and I was wondering how 2 layers of 2.5 OZ of Climashield XP compares with 1 layer of 5 OZ?
Would the scrim make the quilt less compressible? So would the insulation properties be more durable? Would the 2 layers make the bag warmer as air could be trapped in the middle?Or would the 2 layers just make the quilt heavier and no warmer?
Thanks,
Markkit
Hi Markkit,
Sometimes I just use what I have on hand. I had a free 5 yard sample of Primaloft One 1.8 ounce, factory pre-quilted, that I wanted to see how it worked. The scrim on the pre-quilted stuff added one ounce per square yard to the weight of the insulation.
I made another Cuben sleeping bag a few months ago and used one layer of 6 ounce per sq yard of Climashield XP. No scrim on the XP. That sleeping bag has about 14 ounces of insulation and less than 2 ounces of shell material. The new bag uses some Blue Cuben and should be good down to +10 to 0 degrees for under 16 ounces. I make my bags without bottom insulation so I have 14 ounces of XP wrapped around me. For that low a temperature I sleep on a Down Air Mattress.
Nice story as for me. I'd like to read a bit more concerning this topic. The only thing your blog misses is a few pictures of any gizmos.
Jeff Watcerson
Phone jammers
Excellent information. As I have bad knees, I've been trying to reduce the weight I carry as frugally as possible (after having 3 kids, my wife has dropped my gear budget to nil). Thanks for the design ideas & inspiration.
BTW, how does one get 5 yds of Primaloft one? Thanks!
Matt
Excellent article. I tried posting before, so hope this isn't redundant. I've been trying to reduce the weight I carry since I have bad knees. After having 3 kids, my wife has dropped my gear budget to nil. How does one get 5 yards of Primaloft One? Thanks for the design & inspiration.
Matt
Matt,
Seattle Fabric sells Primaloft One:
3 oz. $11.95 yd.
5 oz $16.95 yd.
http://www.seattlefabrics.com/insulations.html
I have a 5 yard roll of the newer version of Primaloft One like Seattle Fabric sells. It almost looks like a big bag of Down and is almost as good as down, maybe a bit better. It does need to be quilted to keep it from moving around.
Post a Comment
<< Home